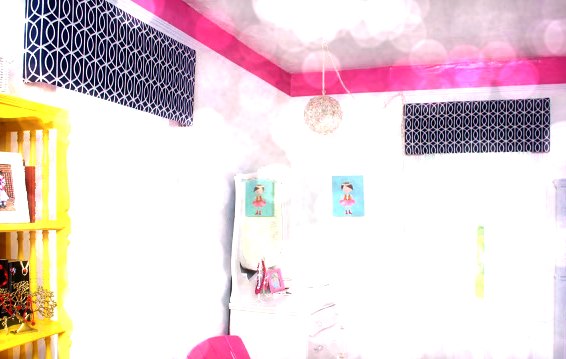
MONDAY MAKEOVER – THE easy VALANCES are still easy!
April 1, 2013
MY MOST POPULAR MAKEOVER OF ALL TIME HAS BEEN WITHOUT A DOUBT:
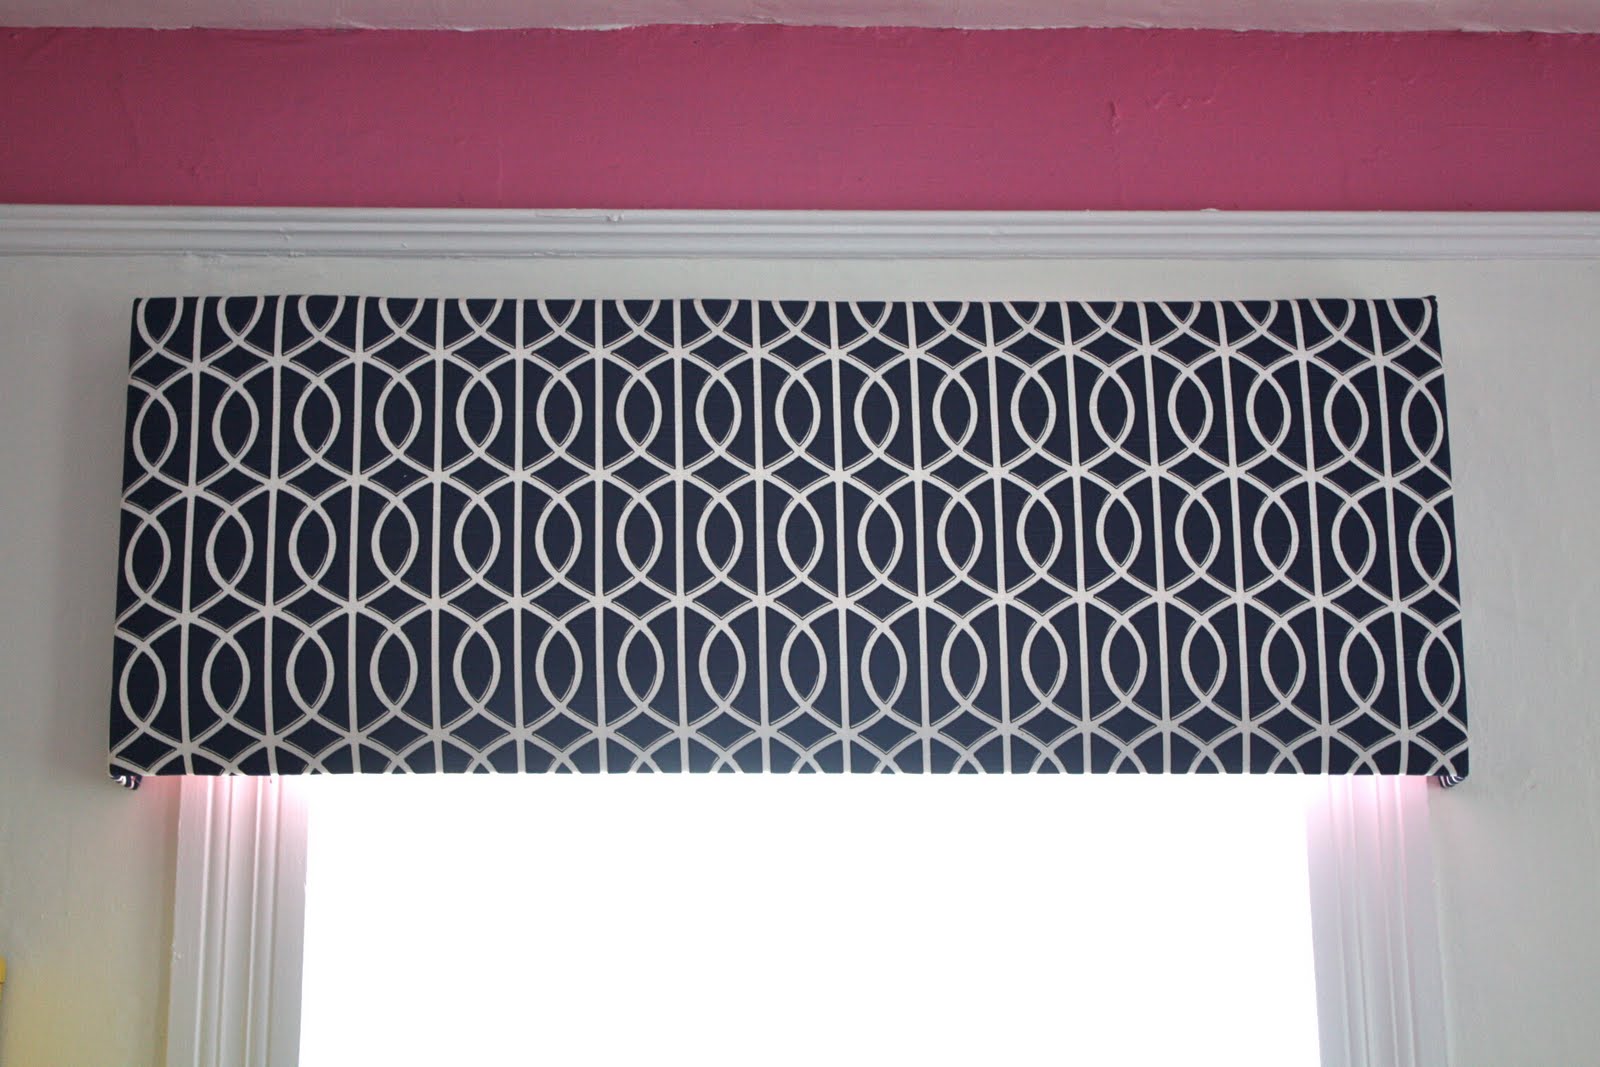
THE “EASY AS PIE” FOAM CORE VALANCE
EASY FOAM CORE VALANCE!
Here is the Quick and Easy TUTORIAL -:
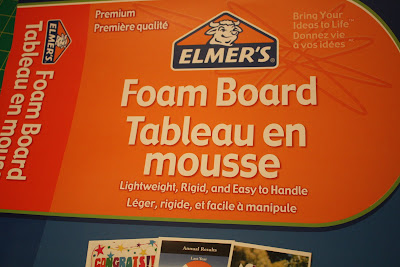
SUPPLIES:
1. Foam Board,like the kind your kids use for last minute school projects, they come in packs
of 3 – 20″ x 30″ pieces (about $9.99) and they actually carry them at our Grocery store, also Michaels, Target, Staples…everywhere they carry school supplies.
2. Staple gun, electric or not, OR DUCK TAPE and…
3. Don’t forget the Appropriately sizes staples (in my case I needed 8mm staples)
4. Fabric – With 52-54″ upholstery fabric you need about 1/2 yard for each helmet , this for solid fabric or a pattern that is horizontal. IF your pattern is vertical, then you will need the amount of yardage length that your window is wide. For example, if your window is 40″ wide and you have 44″ wide fabric but can use it the long way, you will need at least 49″ of fabric.
5.Quilt Batting – as thick as you want it.
6. Scissors, measuring tape and or yard stick , Matt knife, Cutting board, packing or duck tape , super glue (optional), card board or some durable surface to staple gun over.
DIRECTIONS:
Measure your window width and then add 9″, and this is why:
You will need 3 1/2″ on either side to be the SIDES and one extra inch on either side to set the VALANCE out from the window frame.
(You will need to adjust YOUR personal measurements if you want your VALANCE Shallower or narrower or wider.)
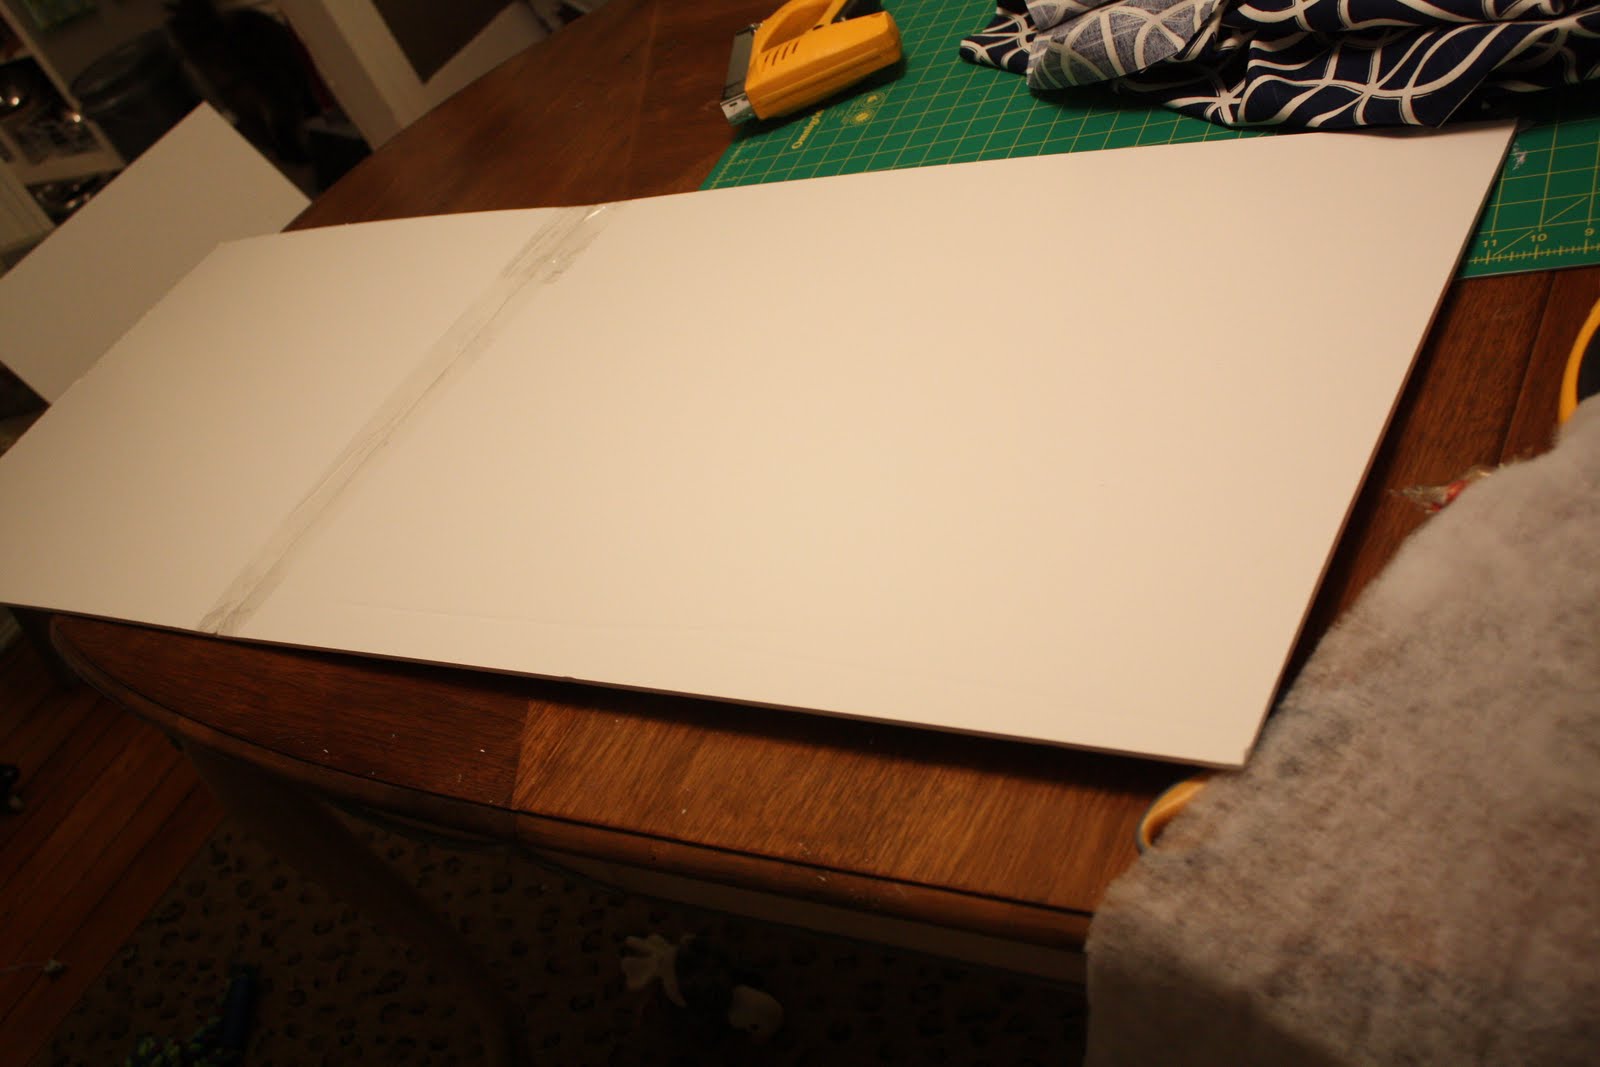
Now, Take your board, (I just used the exact size of the board 20″ x 30″ (NO cutting!) and I cut the second board so that the EQUALED the measured length I needed.
IF you desire to do a pattern, Go HERE and Jenny at Little Green Notebook takes you through
how to do that. Mine is just straight.
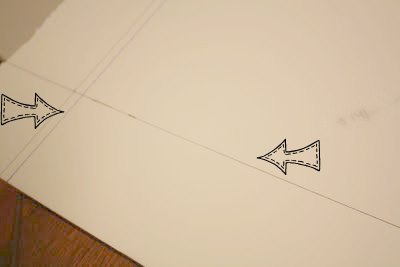
After you get the right combined length, tape the two pieces together, back and front.
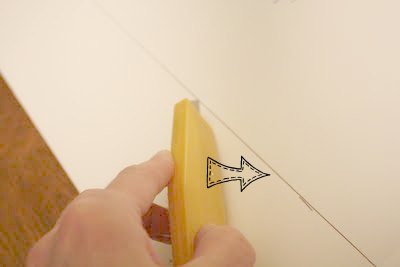
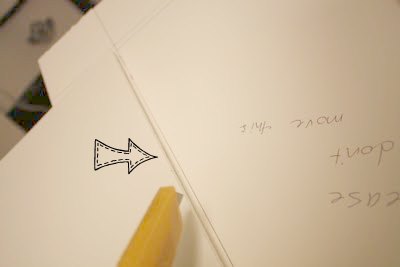
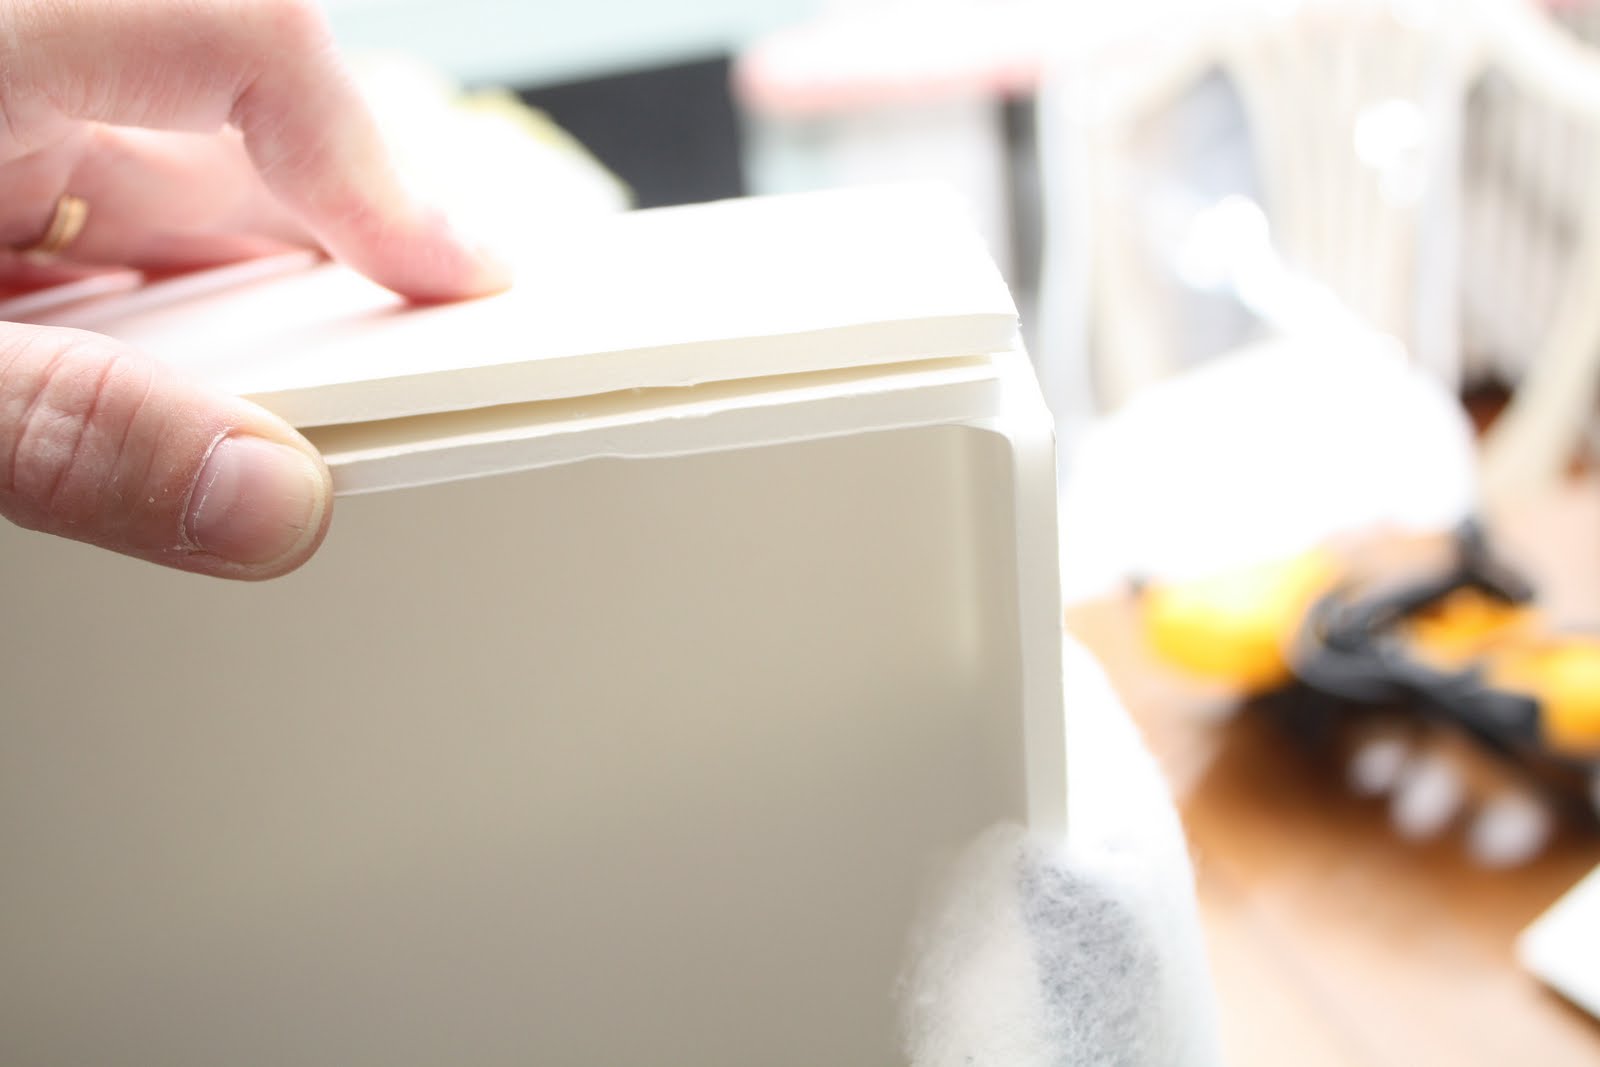
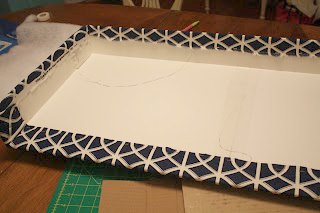
NEXT….on one side of your board, which will be the FRONT, measure out 3 1/2″ on all sides, draw a line, and cut with your mat knife, BUT only a cut half way through, you are going to bend this to make your BOX.
Score the board here…and here..but only halfway through…
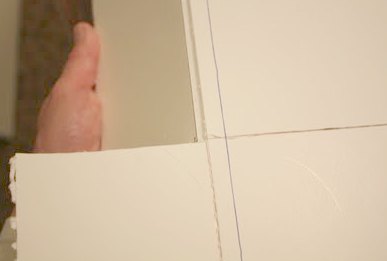
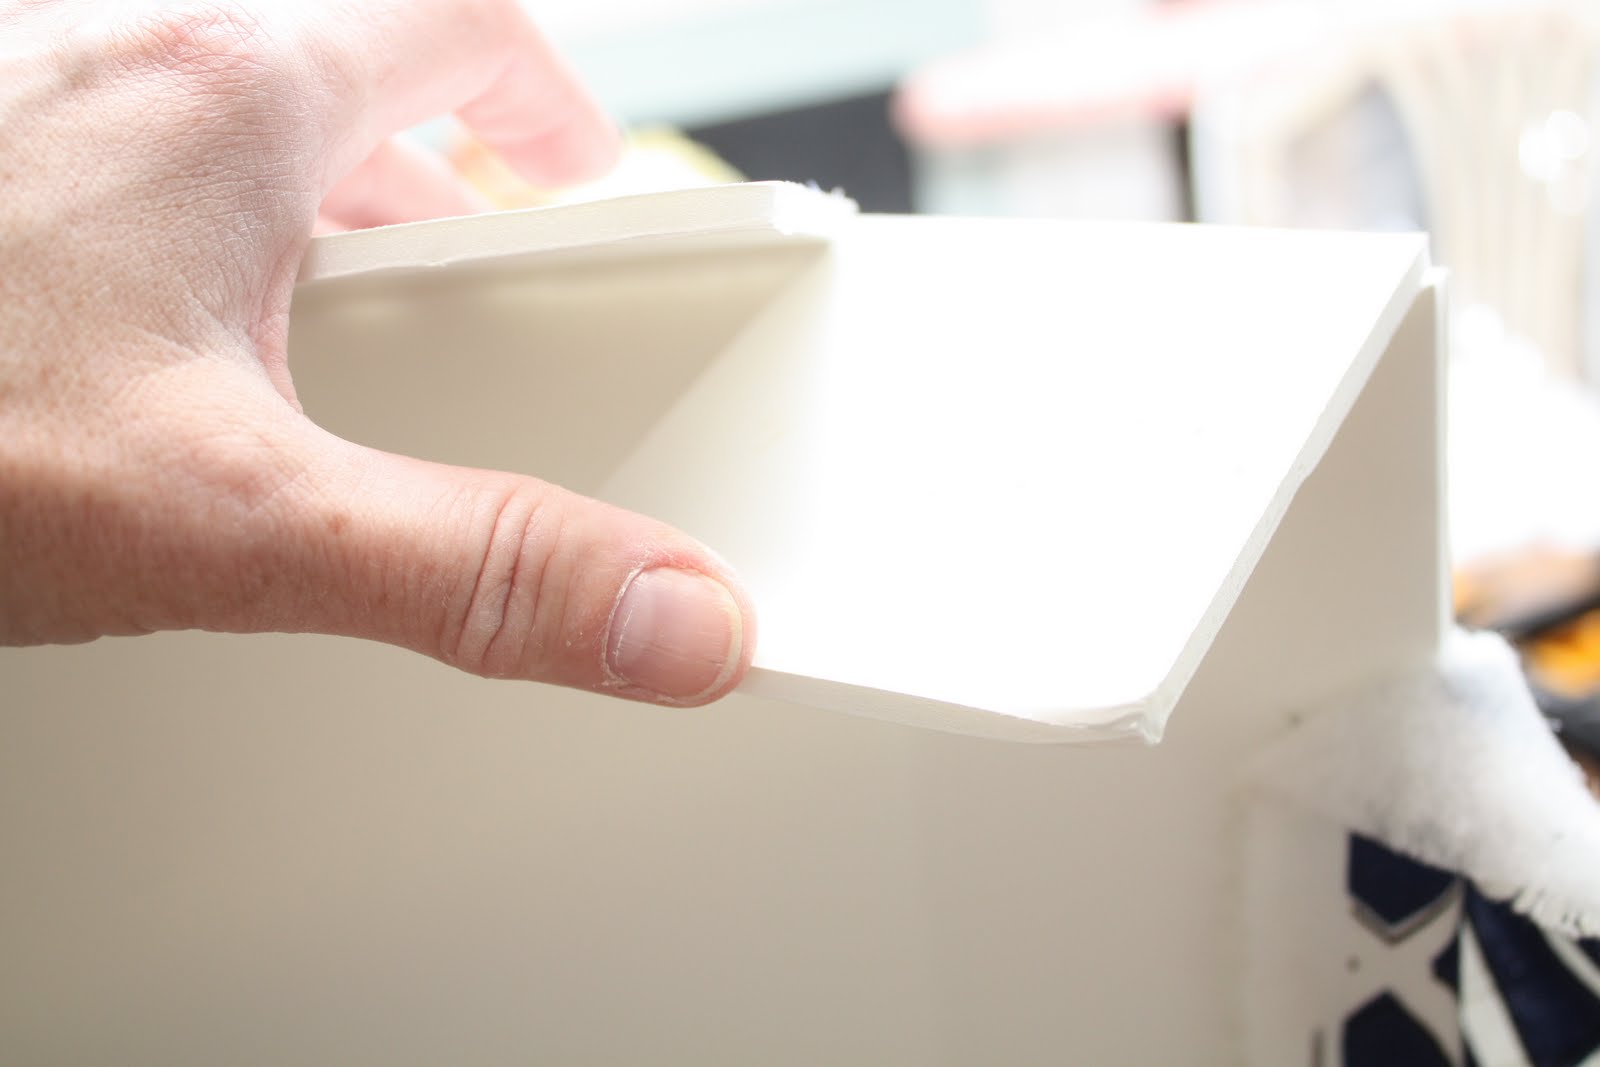
…when you get to the corners, you will have a little box, and the LOWER part, the LINE Part that is on the sides (Parallel with the floor) , you are going to CUT all the way through until you reach the side line, because when you fold that down and tuck it into the side, it will make your BOX!
while you don’t do this until you have stapled or taped your fabric on, you are going to wrap the side fabric around both of these pieces above and staple gun it down on the inside to hold this in place…
Ready to staple or TAPE now?
Annie get your gun/tape!
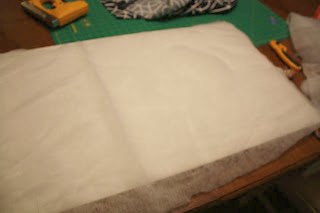
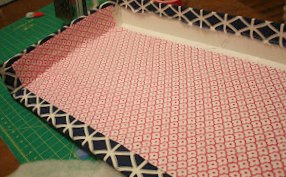
NOW, lay your board down now, FACE UP and layer on your batting…
“Batting”
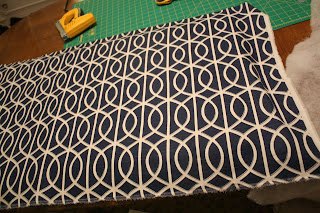
and then your fabric..
…and then flip the whole thing over, and have INSIDE UP .
NEXT, line up your pattern to keep it straight along the edge.
(this is MUCHO IMPORTANTE) and it is why using a solid fabric is easier, but YOU CAN DO IT! Just pick a part of your fabric to line up and keep it consistent.
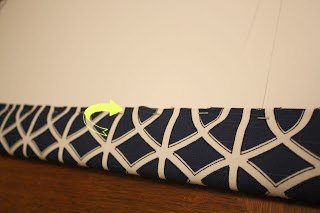
Tape or Staple HERE
…see how I followed that upside down V with the line in it and kept that LEVEL,
in this way, pattern IS YOUR FRIEND!
…so staple all the way around about 2 inches apart, or Tape along the length of the fabric…alternating sides to keep it nice and straight and NOT pulling to tight in any direction. Be If you ARE stapling…CAREFUL not to press too hard with your gun (or too light) because you will go into your surface underneath, like I did! OR if you go too light, the staples don’t go in deep enough. The good news is : if they do not go all the way in, you can just push them in with your finger.
Lastly, I took some left over sheeting fabric to line my Valances, though lining is optional, but our ceilings are high and you can see INTO the inside and it looks unfinished. So I used my FAVORITE thing, Stitch Witchery, and ironed on the fabric!!! I stapled areas that looked unstable…or un staPle! ha!
Now to hang them up.
INSTALLATION!!!
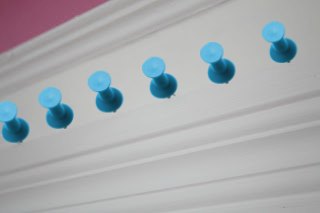
I put nails all the way across the top of the window trim, about 5 inches apart,
THE PUSHPINS ARE THERE TO HELP YOU SEE WHERE TO PUT THE NAILS
then I hung the VALANCES on the nails.
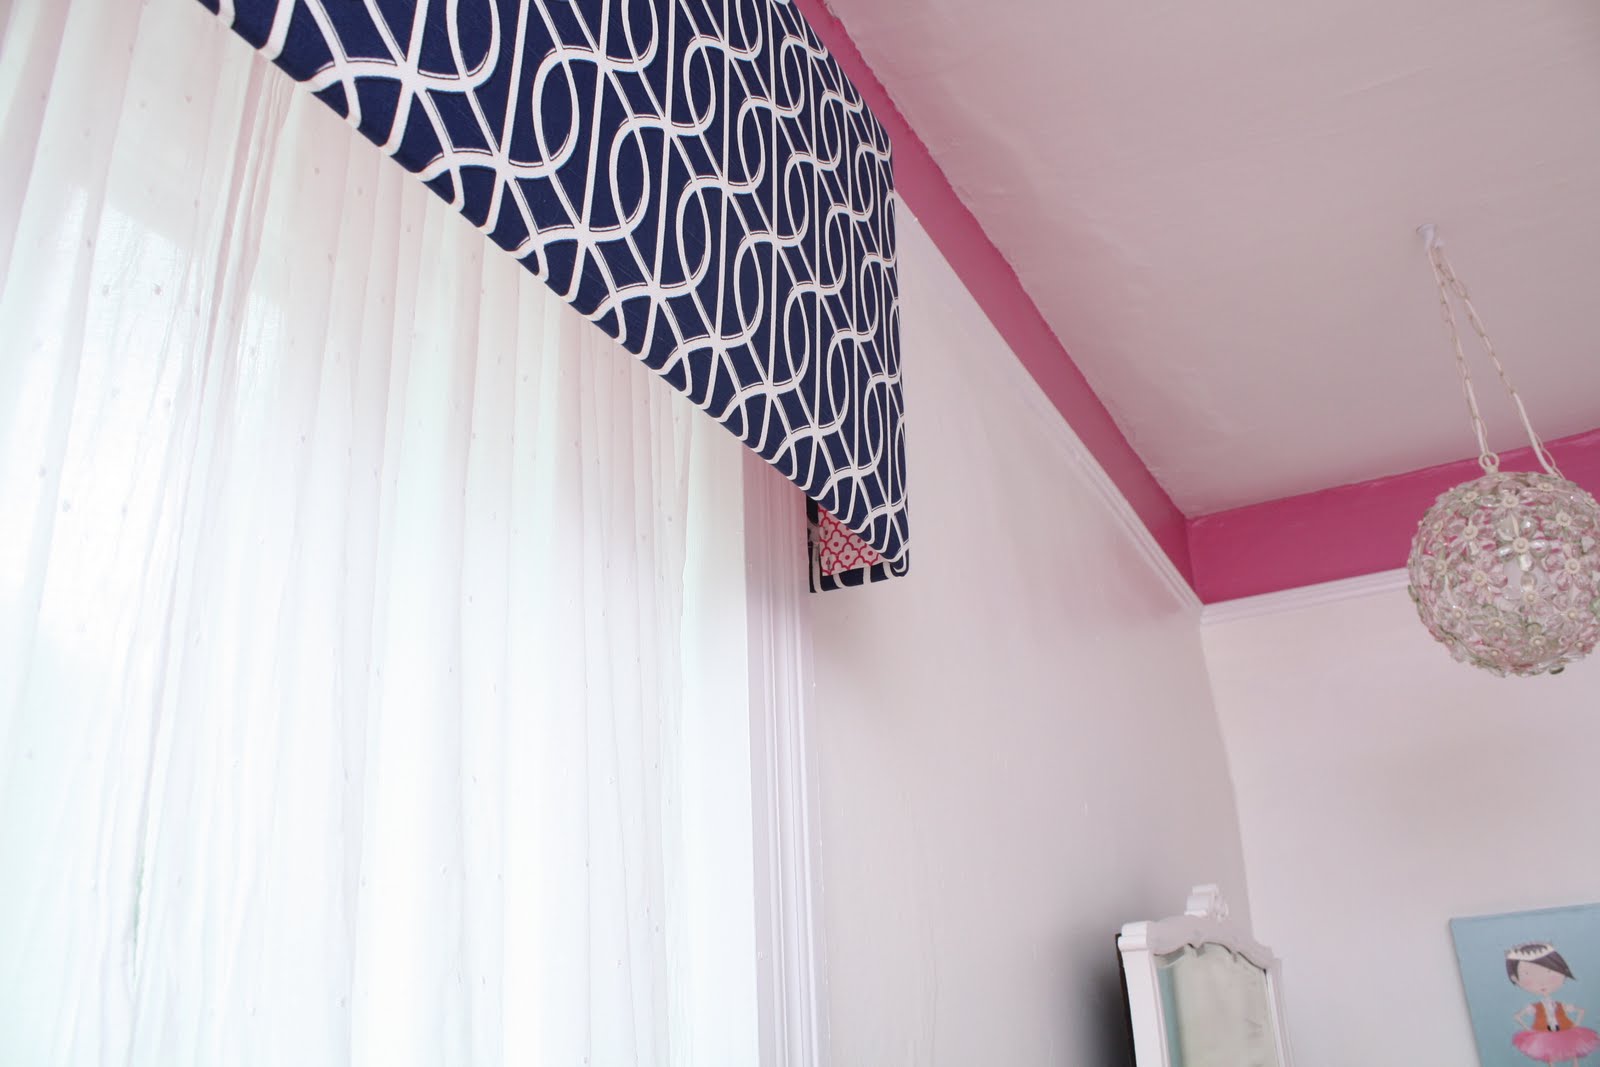
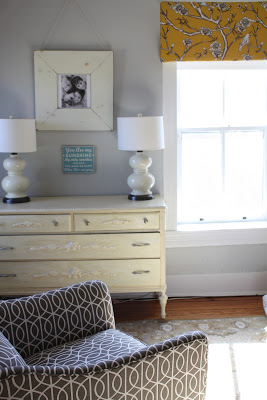
I was SO SMITTEN with these Valances that I have gone o to make them for the Master Bedroom as well!!!
Master Bedroom Valances
…so there you have…The easy as Pie Valances…there are SO many things about these valances I love..for
1.You can RE USE the fabric later, when you are ready for a change.
2. They are Light weight and affordable to make!
3 The are so easy to make and thus are a confidence builder in the DIY department.
4. They look FANTASTIC!!!
Happy Monday!!!
Do you have a favorite Makeover???Share your links with me…I would love to collect some great ones to share with all of you.
.
2 thoughts on “MONDAY MAKEOVER – THE easy VALANCES are still easy!”
Wow! That does look really easy. Thanks for posting!
Those are so pretty! Thanks for showing us how to make them!


 …so there you have…The easy as Pie Valances…there are SO many things about these valances I love..for
Wow! That does look really easy. Thanks for posting!
Those are so pretty! Thanks for showing us how to make them!