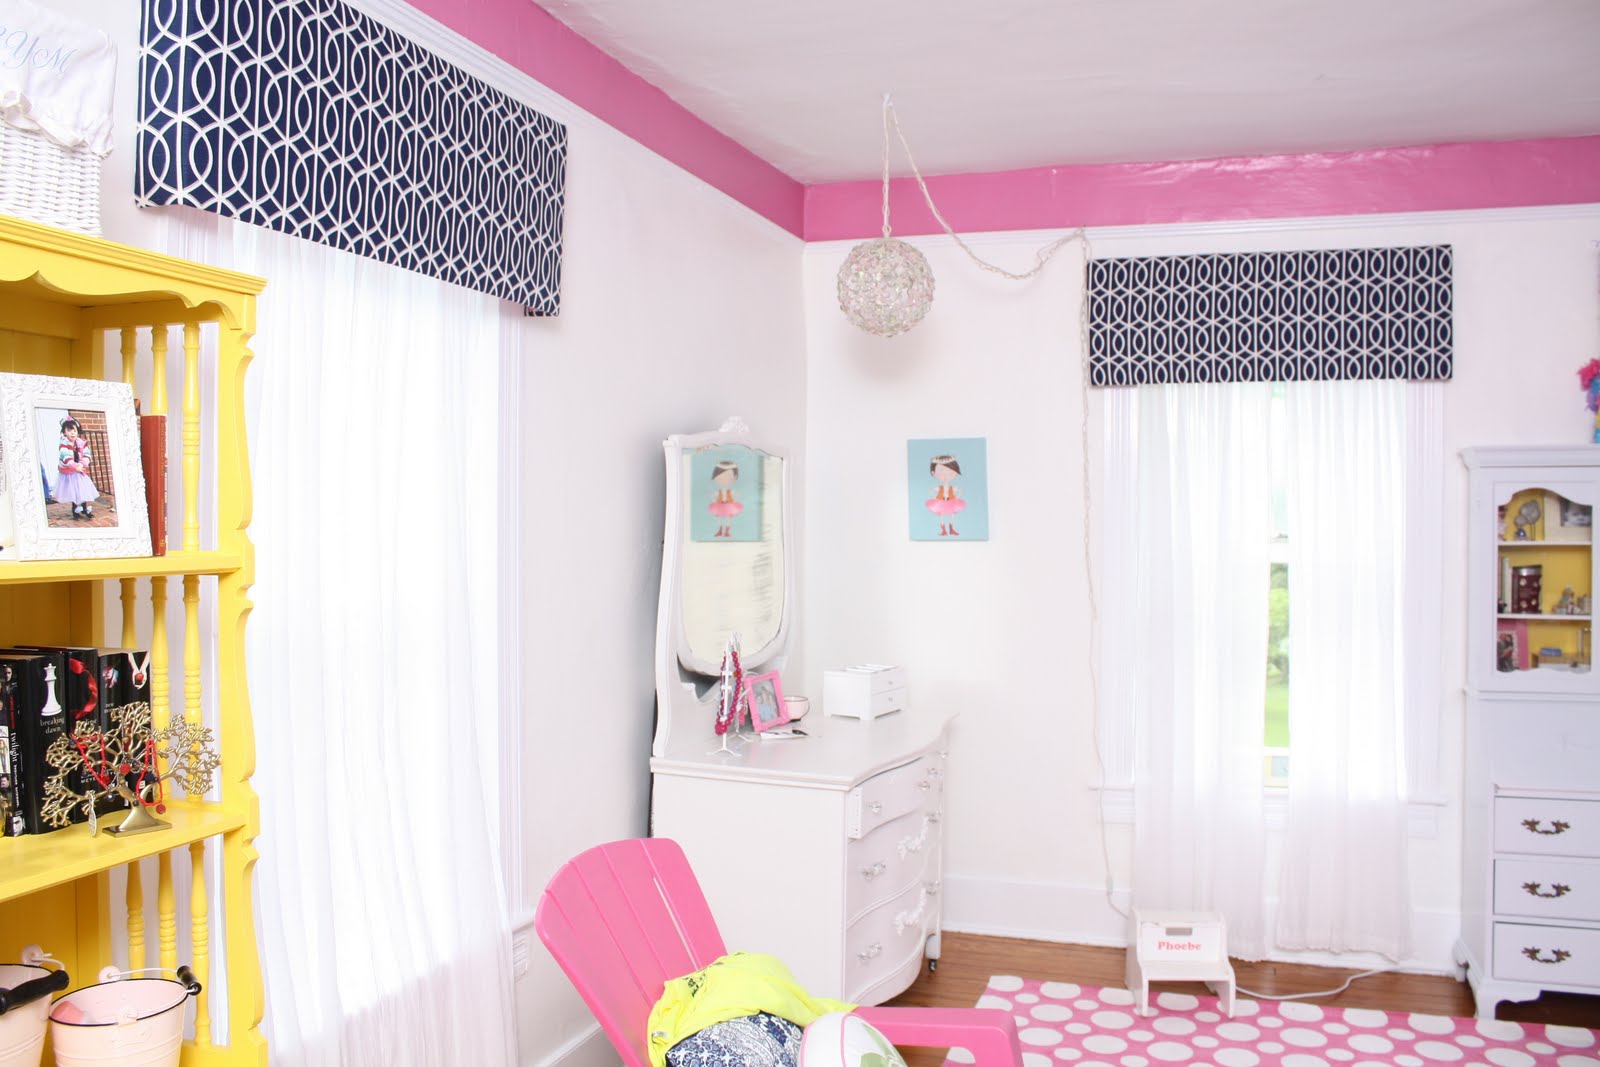
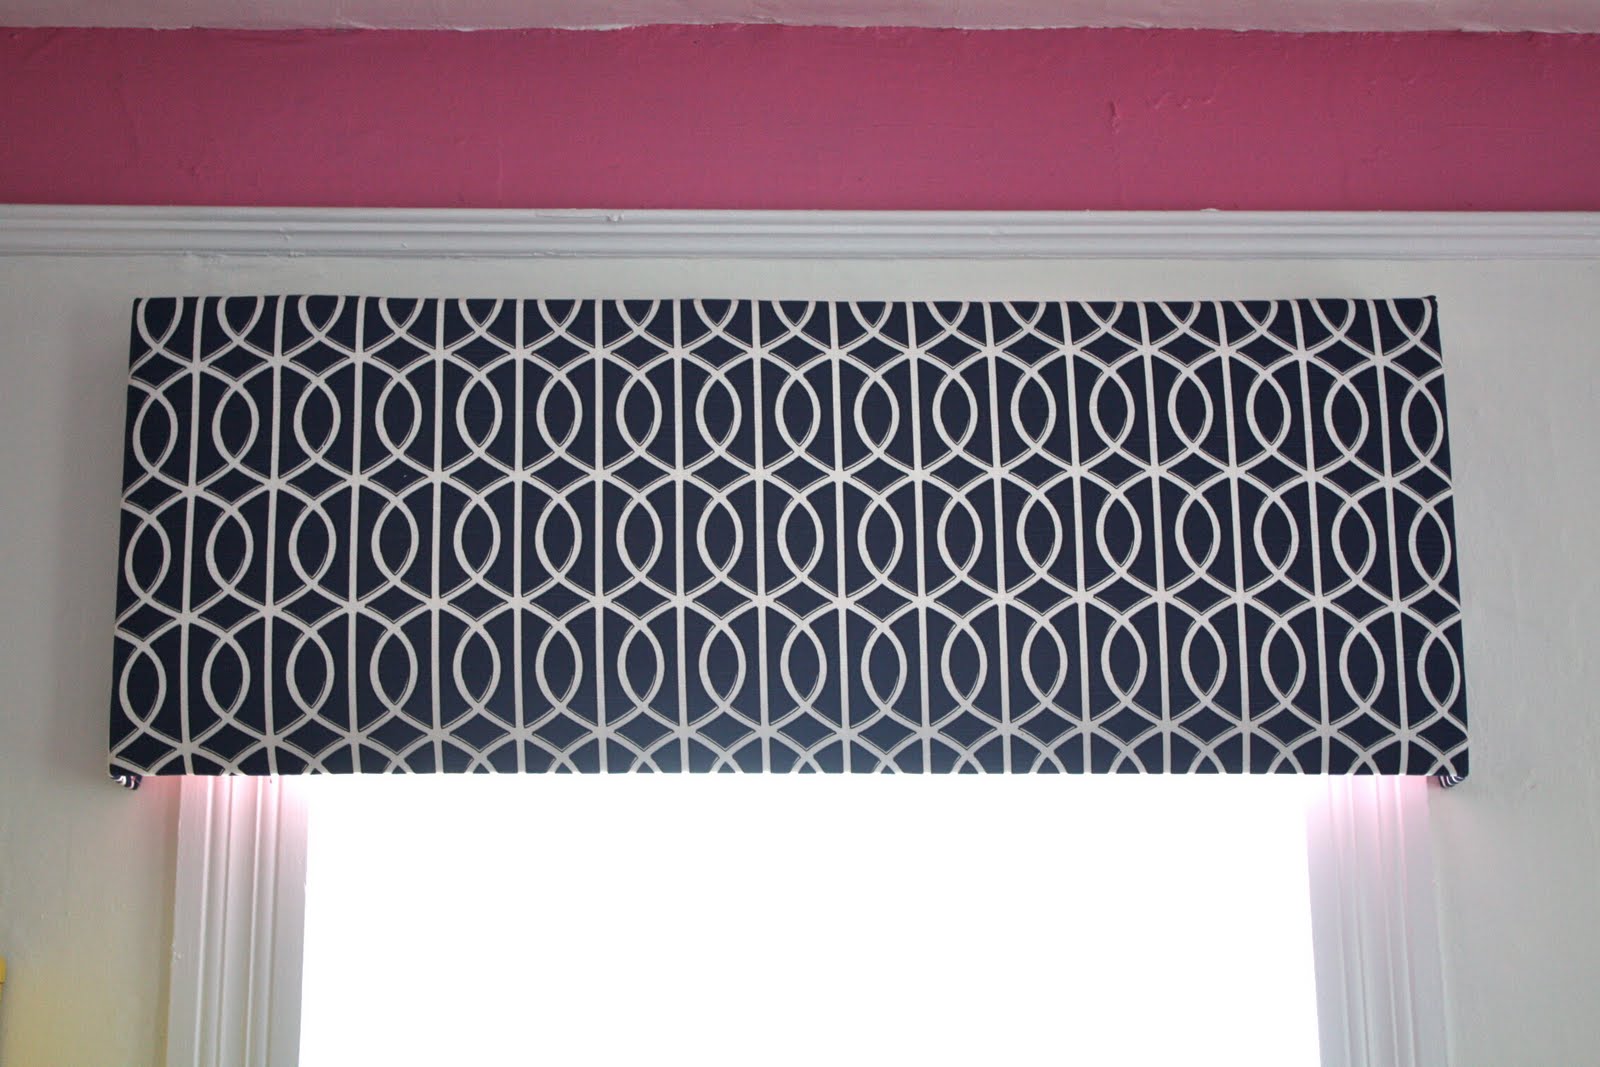
Finally, after a small bout of procrastination, I have completed the CORNICES!!!!
Some people call them valances,SOME call them “PELMET BOXES”,
I used to call them “those fabric covered thingies that go over the curtains”.
BUT,
For this post we will refer to them as “CORNICES”
First lets have a:
TUTORIAL –
What I used:
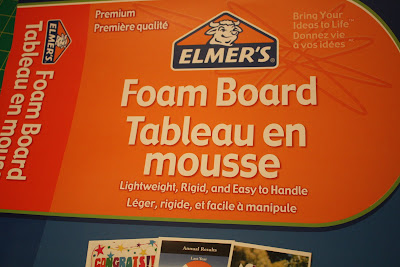
1. Foam Board, like the kind your kids use for last minute school projects, they come in packs
of 3 – 20″ x 30″ pieces (about $9.99) and they actually carry them at our Grocery store, also Michaels, Target, Staples…everywhere they carry school supplies.
2. Staple gun, electric or not, and…
3. Don’t forget the size 8mm staples
4. Fabric- With 52-54″ upholstery fabric you need about 3/4 yard for each Pelmet , this for solid fabric or a pattern that is horizontal. IF your pattern is vertical, then you will need the amount of yardage length that your window is wide. For example, if your window is 40″ wide and you have 44″ wide fabric but can use it the long way, you will need at least 49″ of fabric. Check your measurements and calculations BEFORE you purchase and then cut and if all else fails…ask your kids to do the math!
5.Quilt Batting – as thick as you want it.
6. Scissors, measuring tape and or yard stick , Matt knife, Cutting board, packing or duck tape , super glue (optional), card board or some durable surface to staple gun over.
Okay here we go-
First, measure your window width and then add 9″, and this is why:
You will need 3 1/2″ on either side to be the SIDES and one extra inch on either side to set the Pelmet out from the window frame.
(You will need to adjust YOUR personal measurements if you want your Pelmet Shallower or narrower or wider.
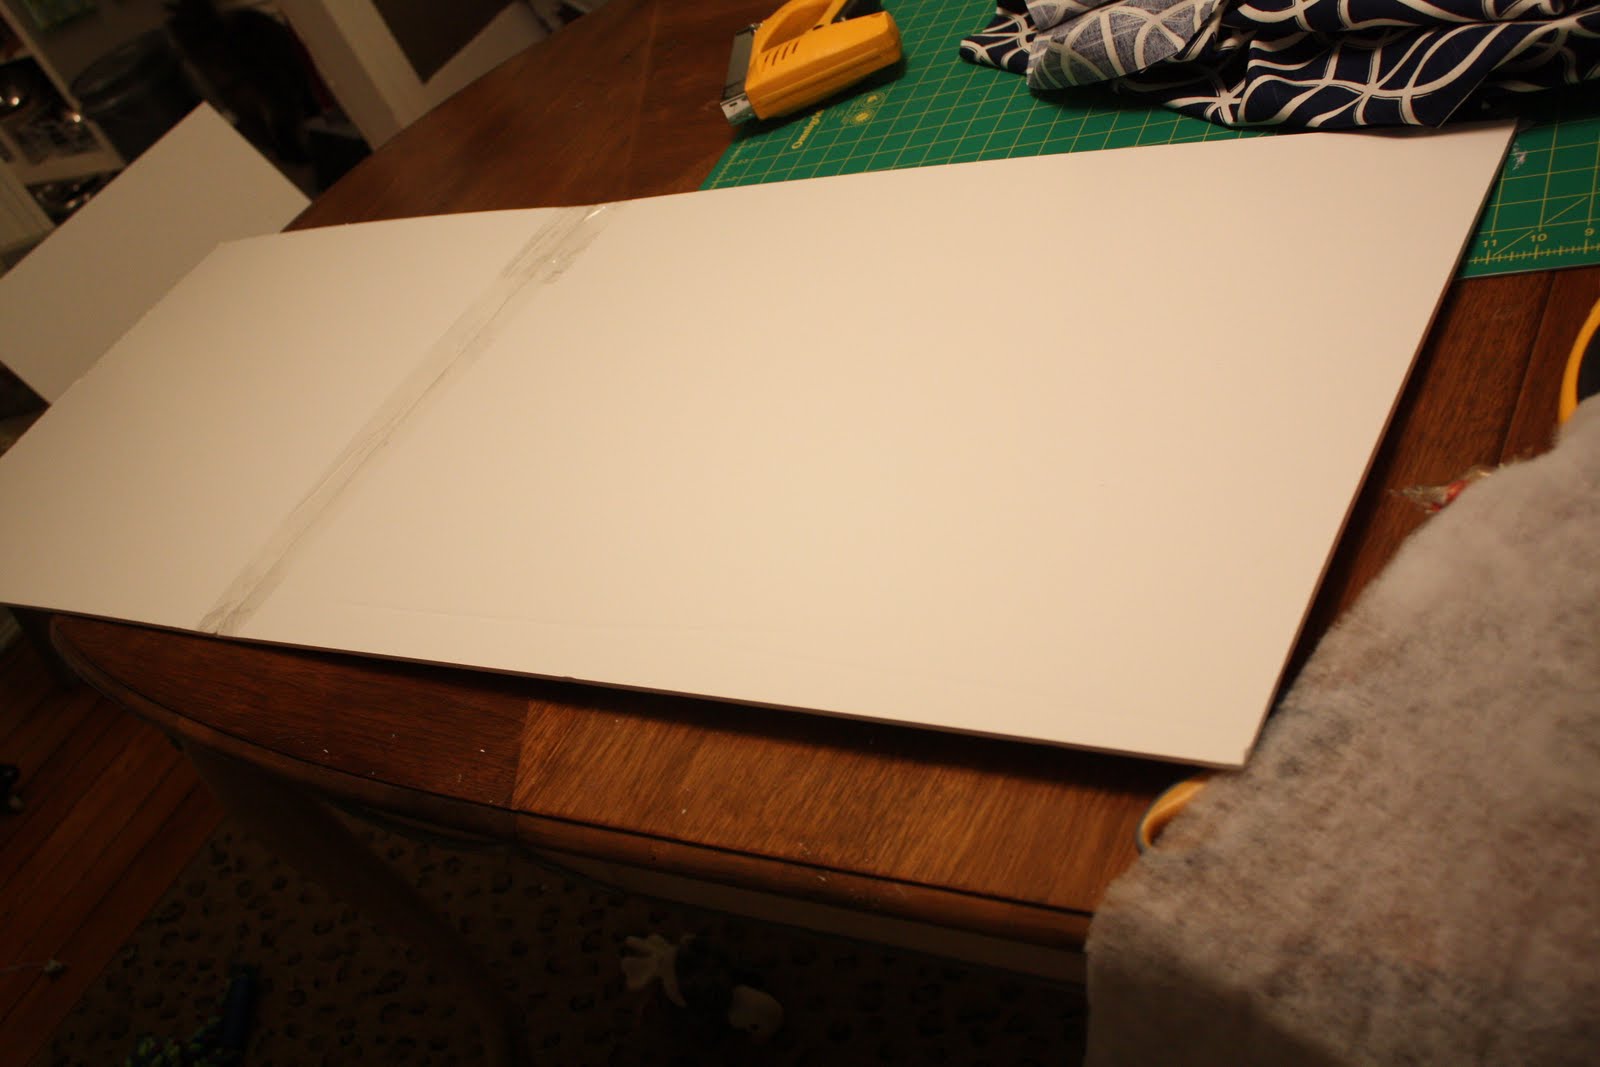
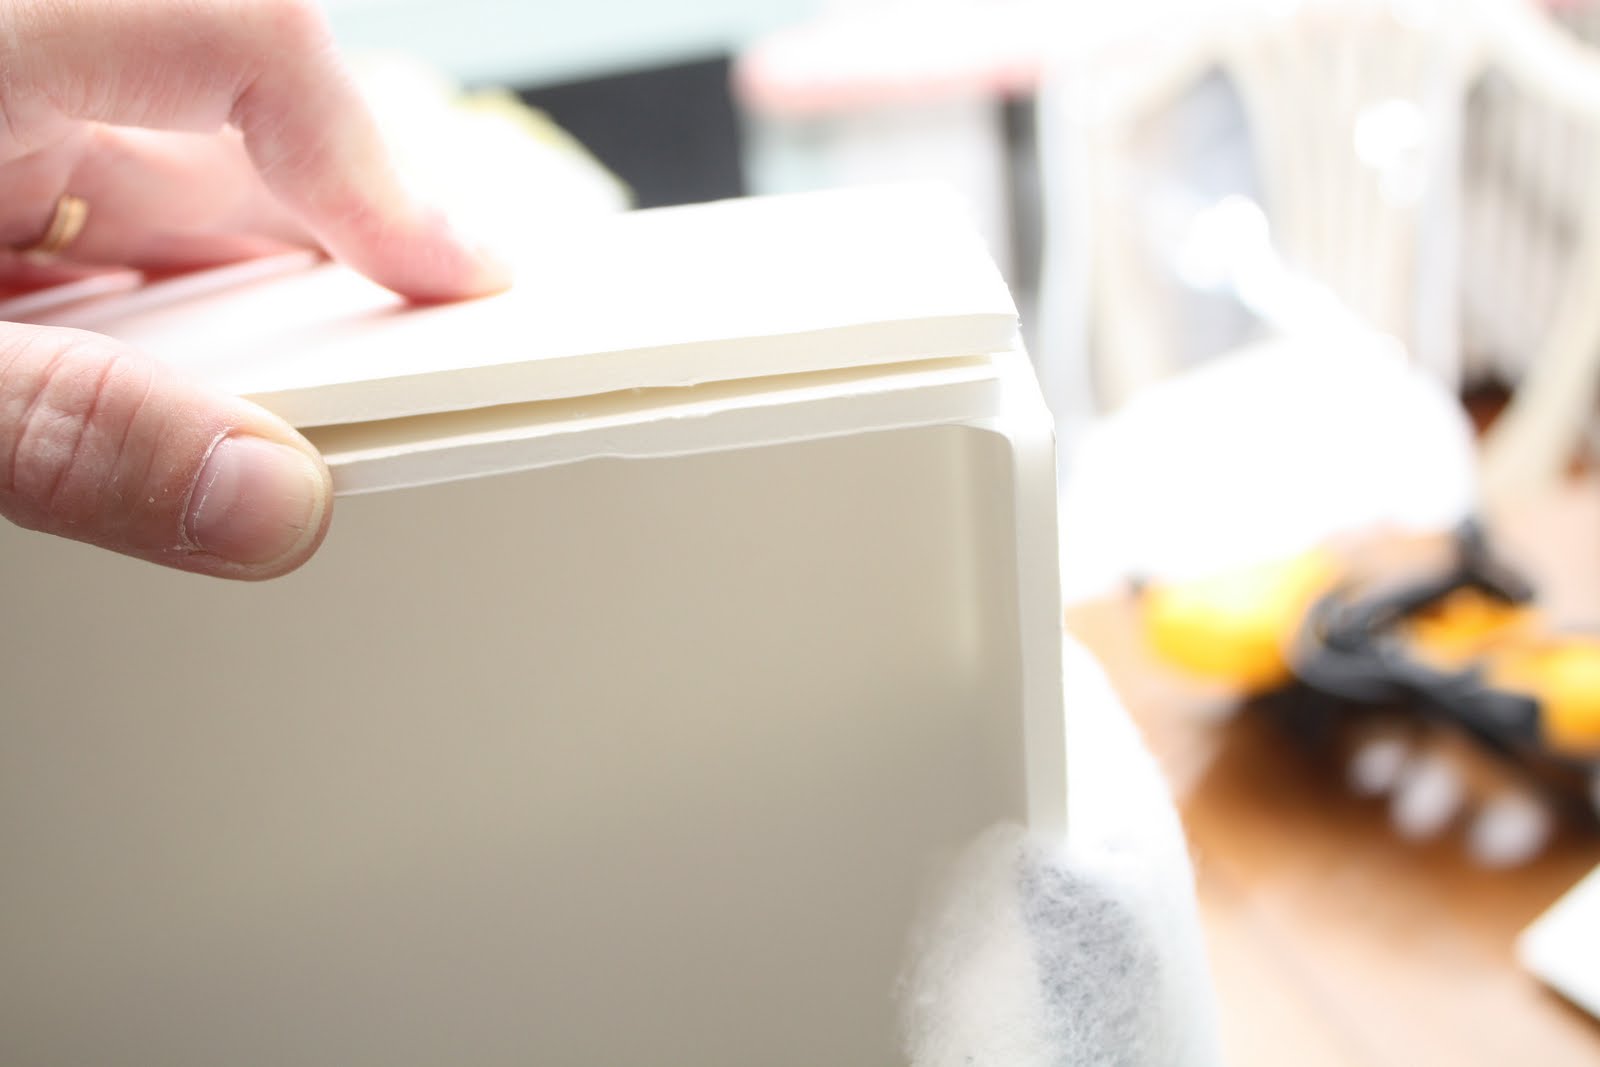
Now, Take your board, (I just used the exact size of the board 20″ x 30″ (NO cutting!) and I cut the second board so that the EQUALED the measured length I needed. IF you ant to do a pattern, Go
HERE and Jenny at Little Green Notebook takes you through how to do that. Mine will just be straight.
After you get the right combined length, tape the two pieces together, back and front.
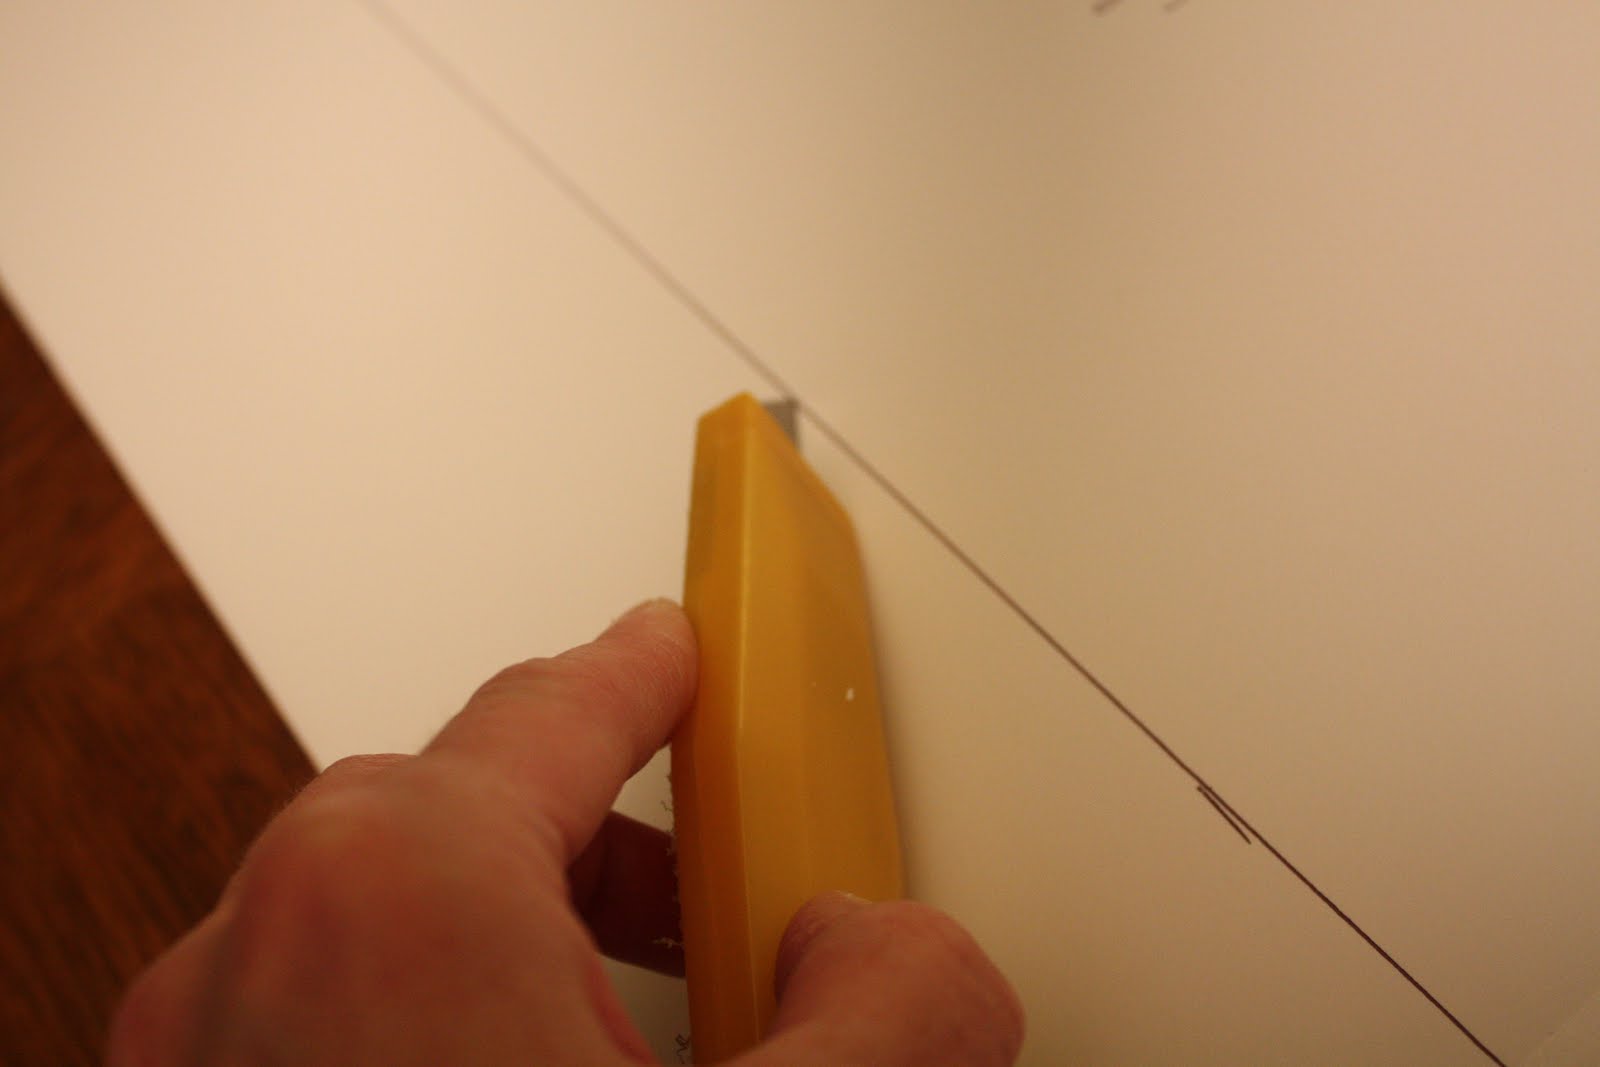
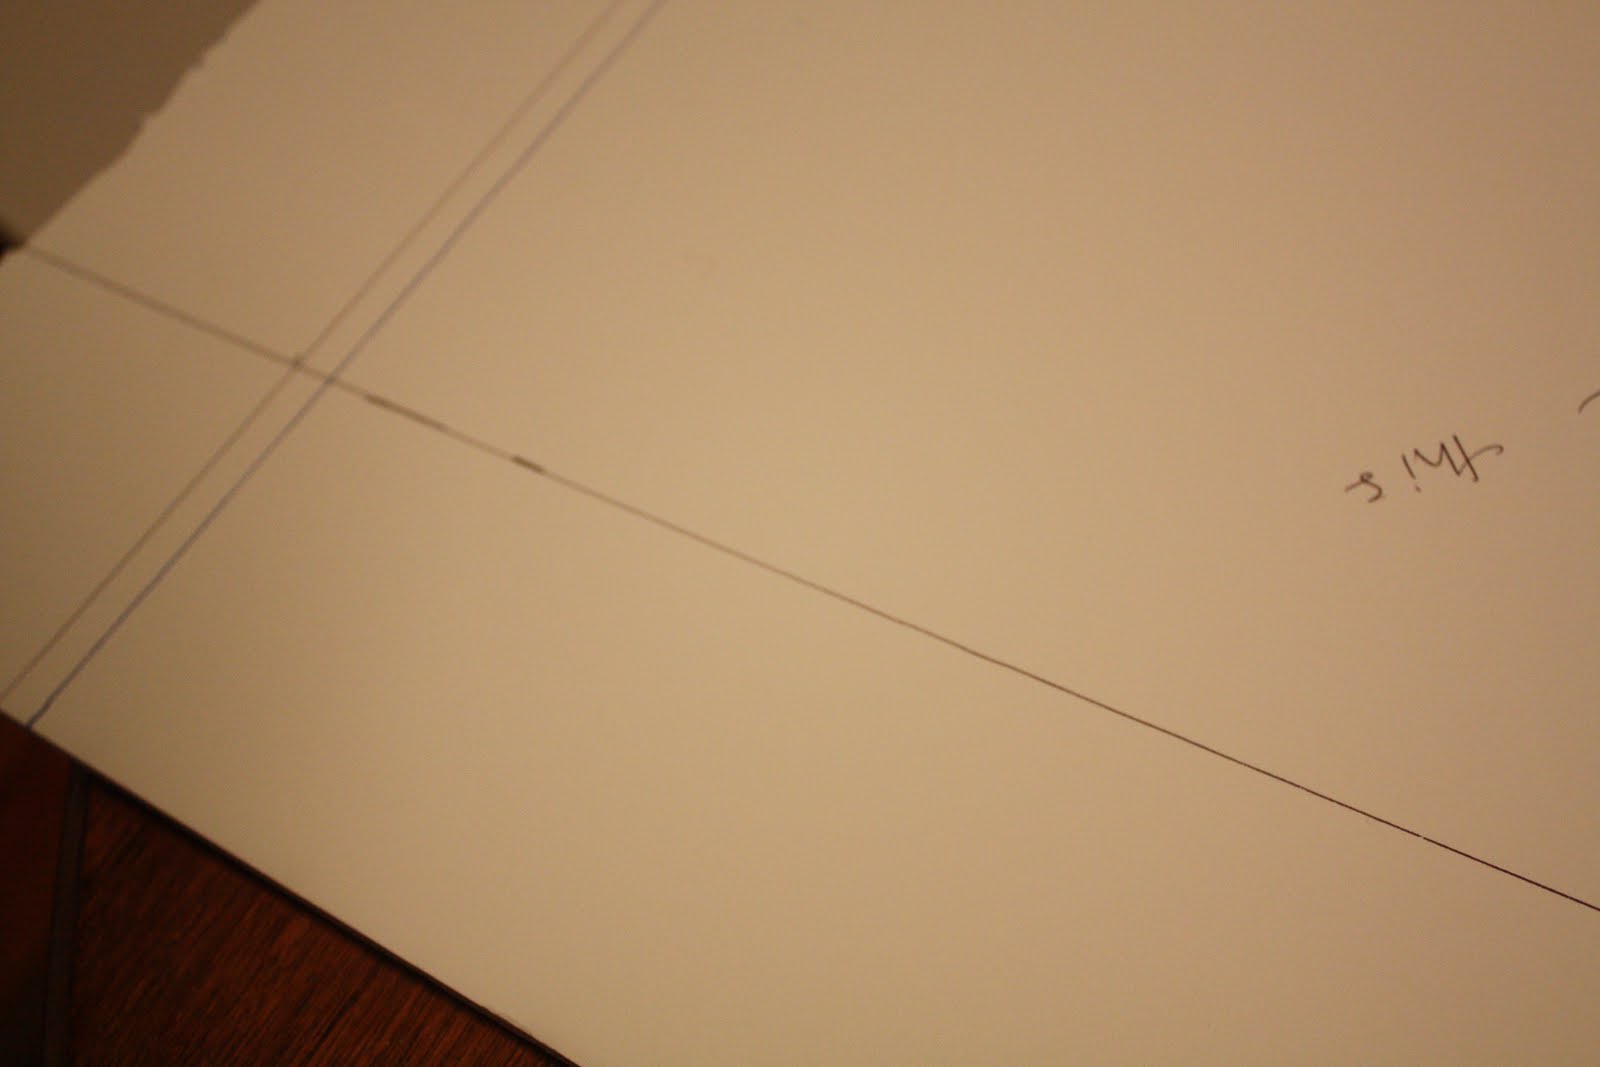
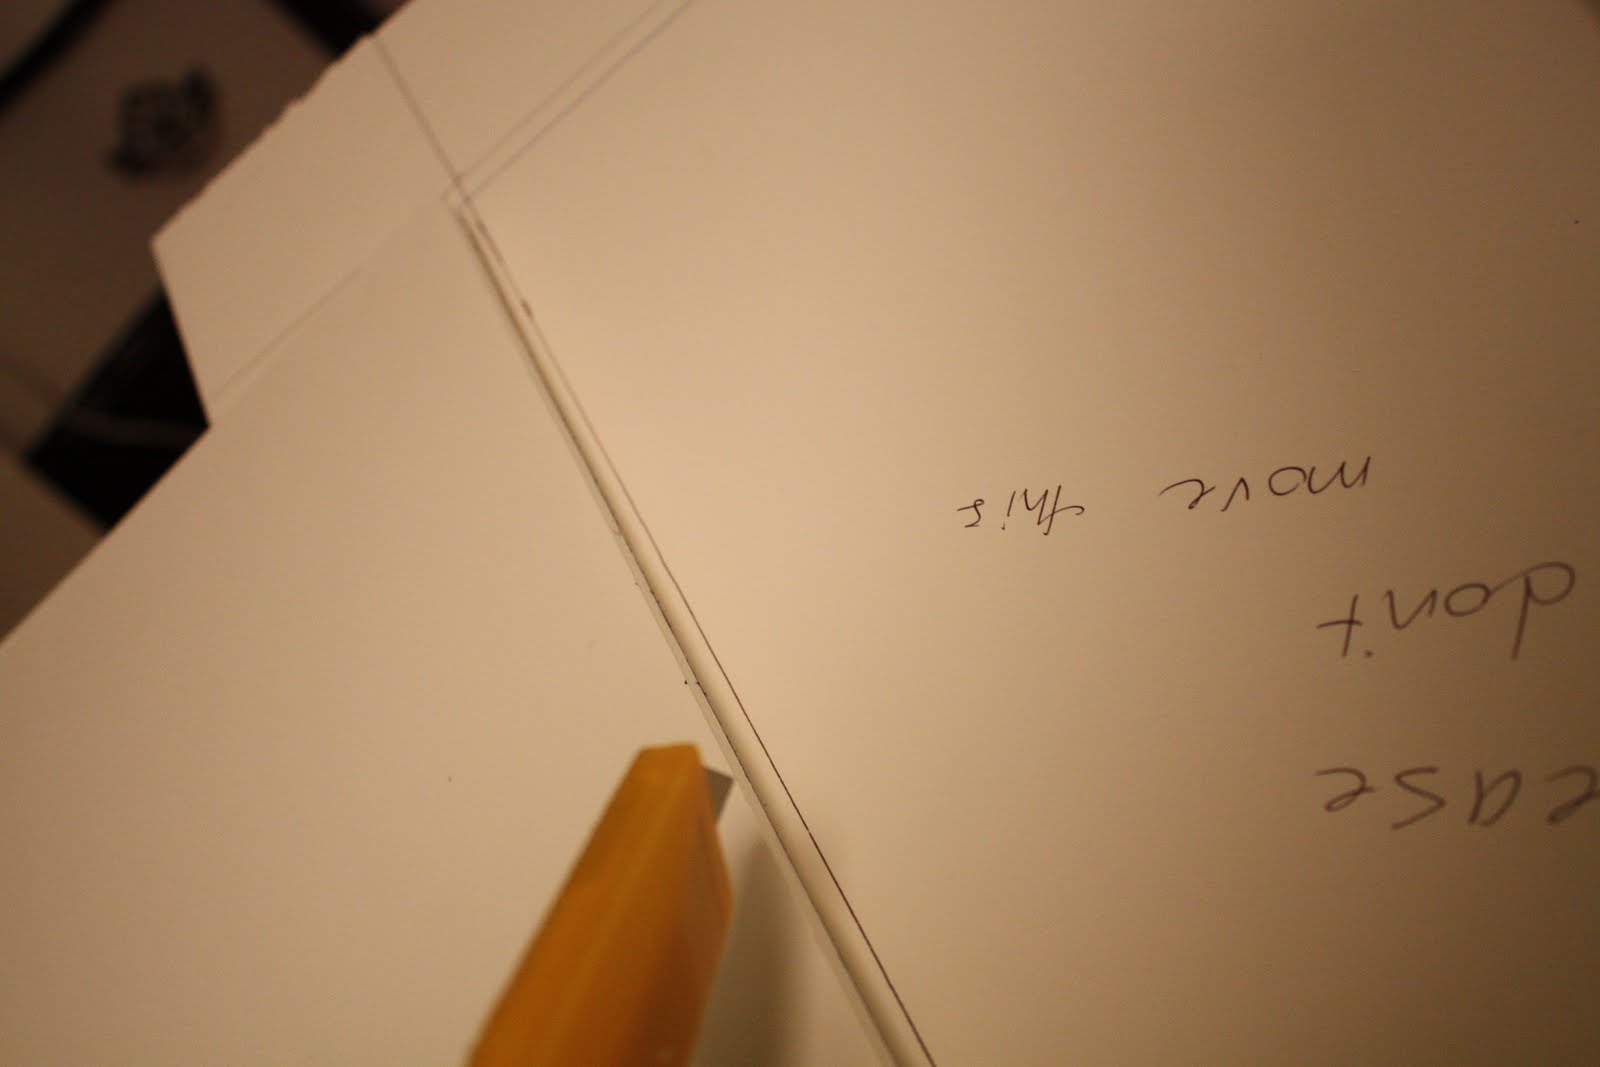
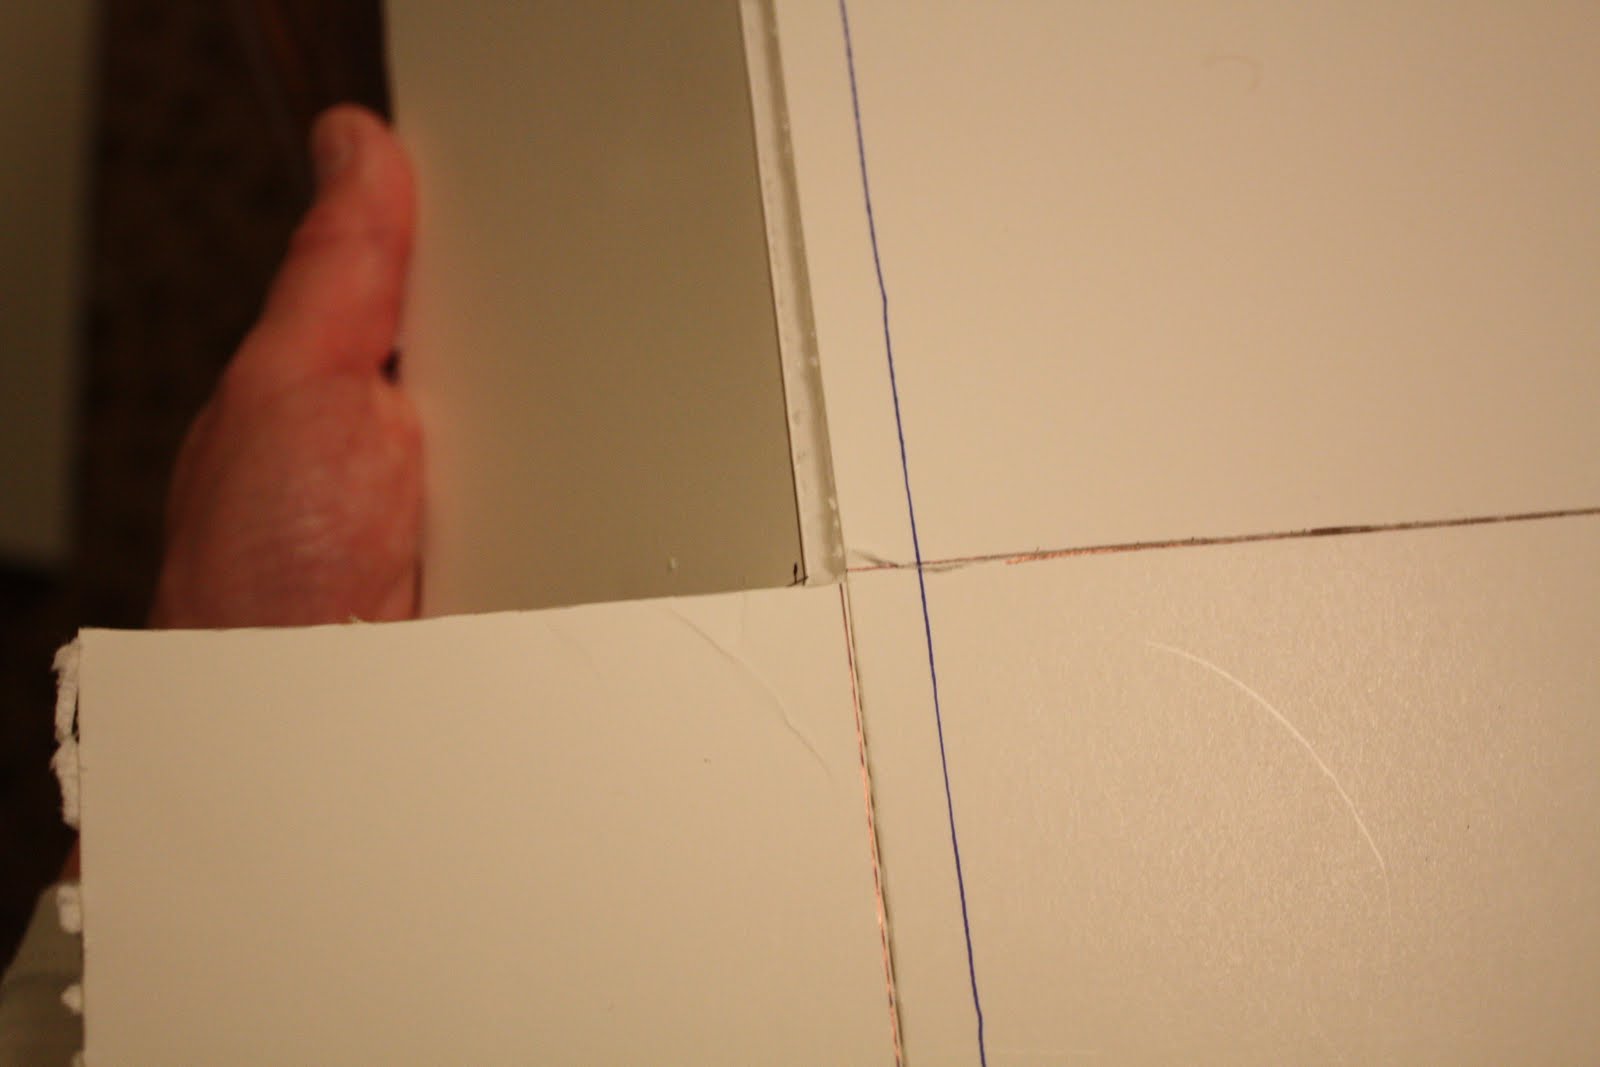
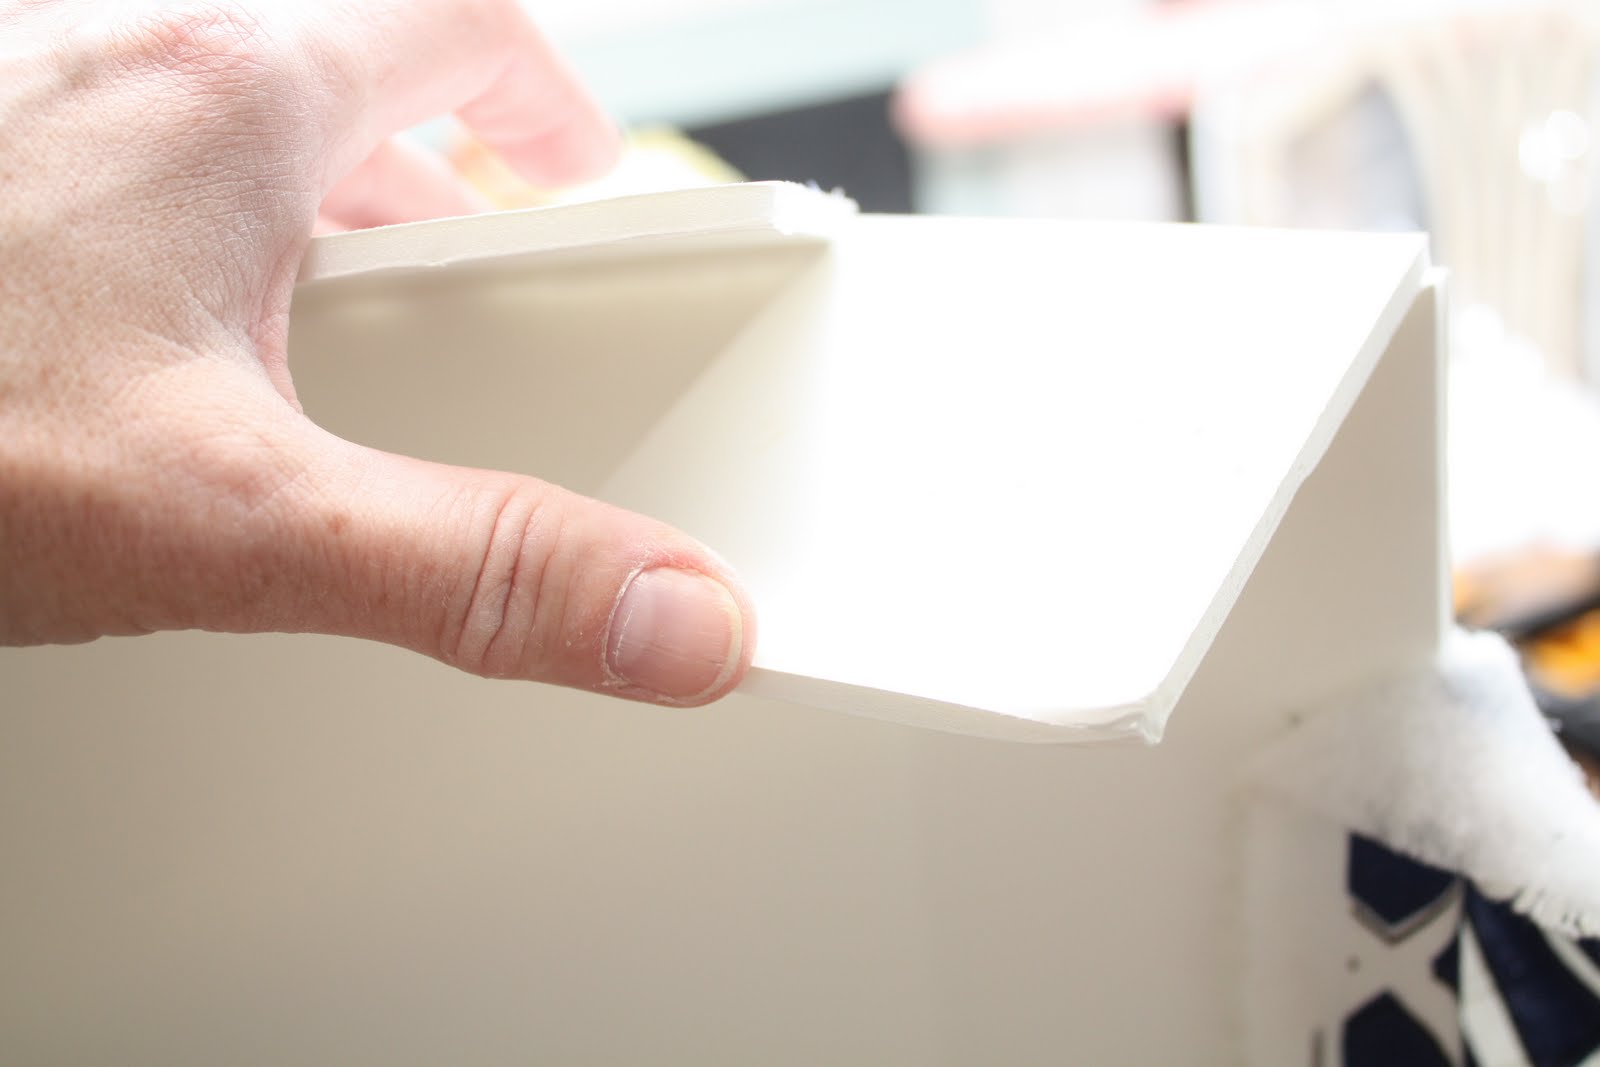
NEXT….on one side of your board, which will be the FRONT, measure out 3 1/2″ on all sides, draw a line, and cut with your mat knife, BUT only a cut half way through, you are going to bend this to make your BOX.
…when you get to the corners, you will have a little box, and the LOWER part, the LINE Part that is on the sides (Parallel with the floor) , you are going to CUT all the way through until you reach the side line, because when you fold that down and tuck it into the side, it will make your BOX!
while you don’t do this until you have stapled your fabric on, you are going to wrap the side fabric around both of these pieces above and staple gun it down on the inside to hold this in place…
Ready to staple now?
Annie get your gun!
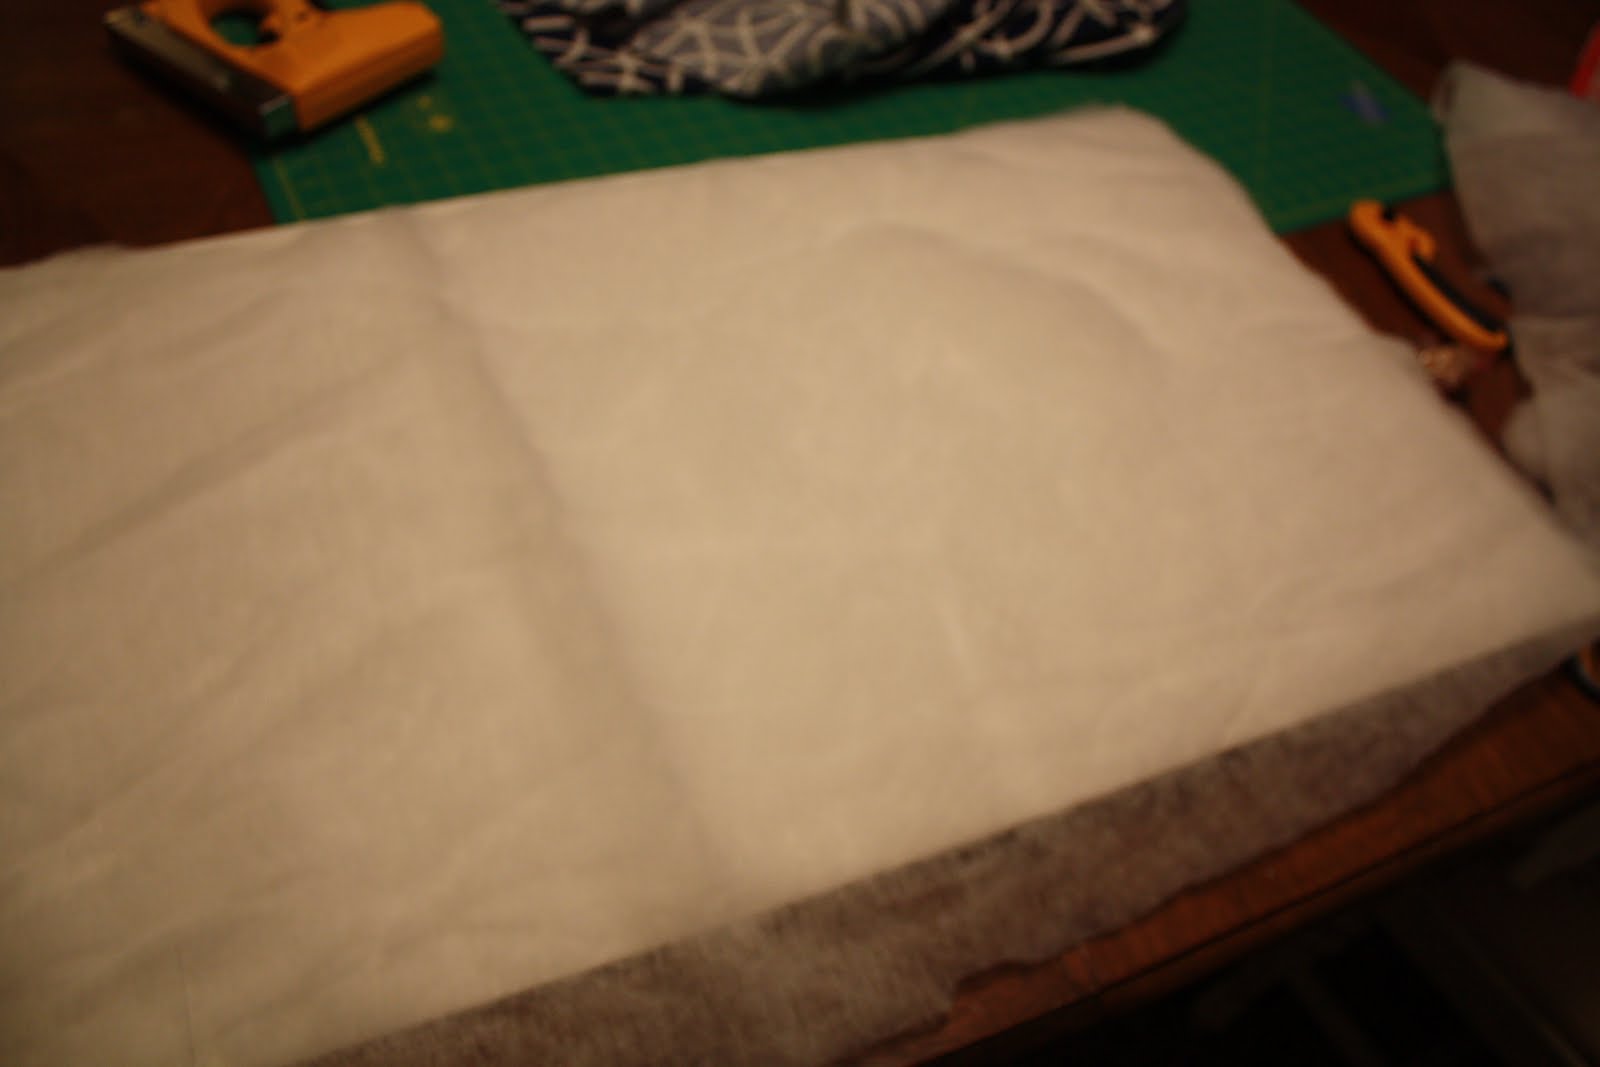
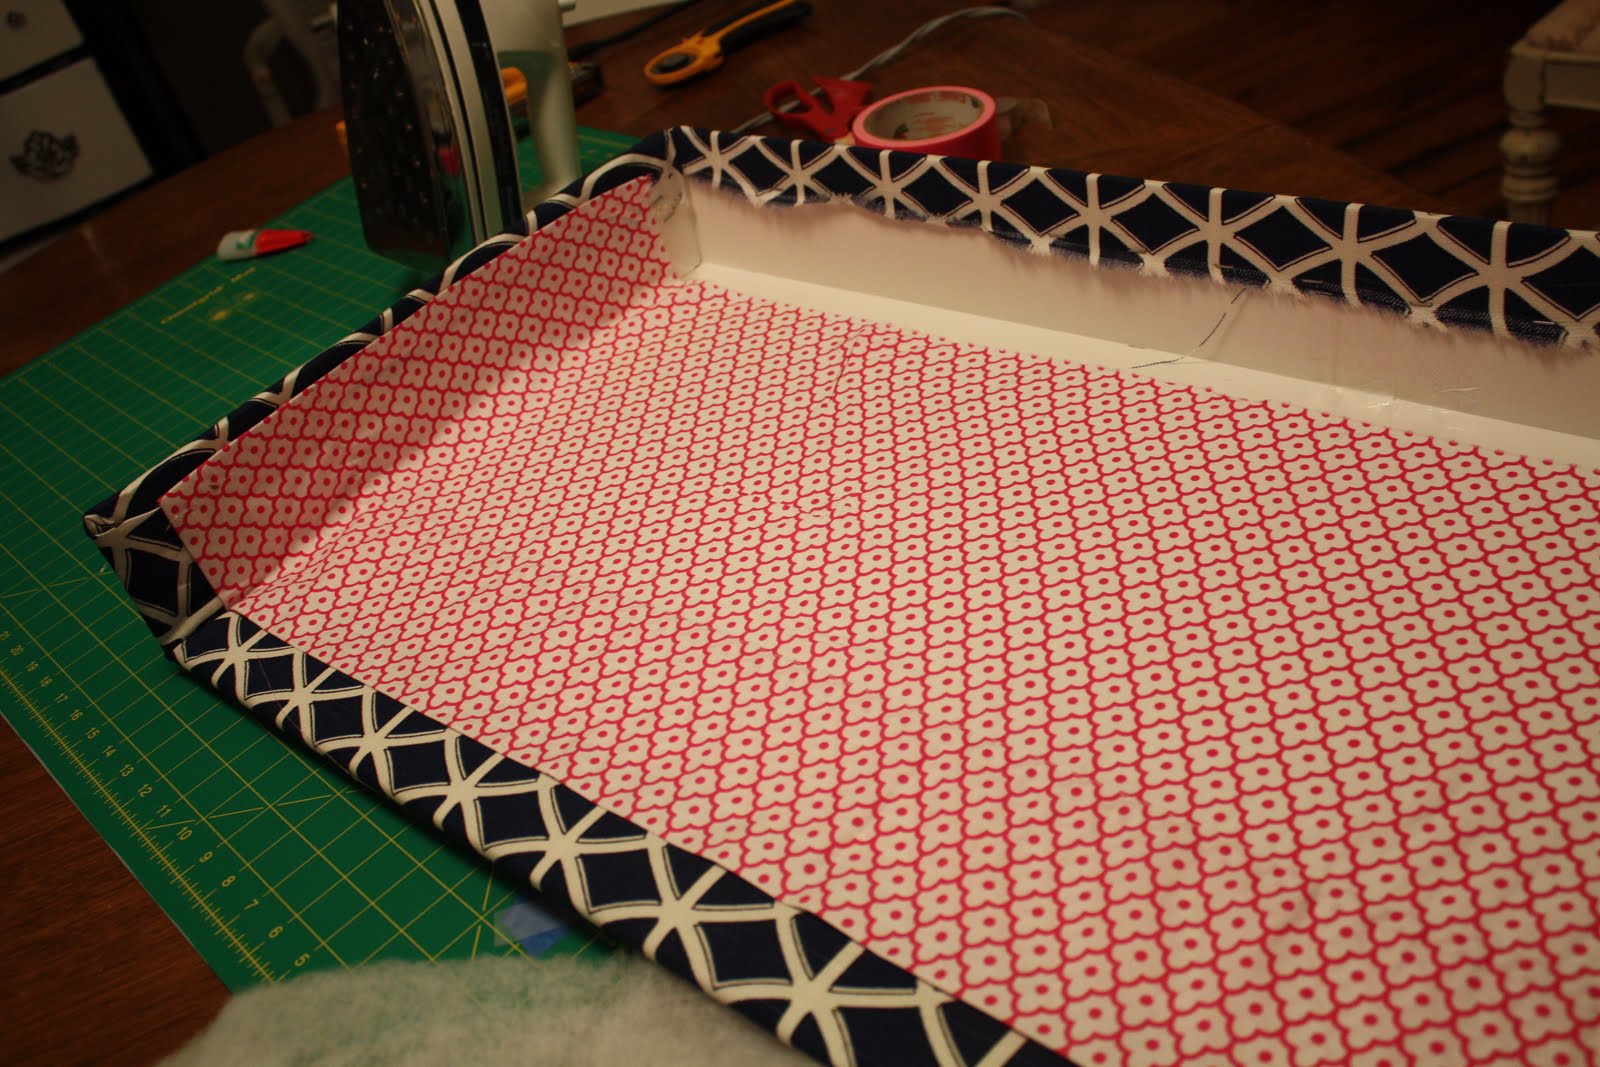
NOW, lay your board down now, FACE UP and layer on your batting…
and then your fabric..
…and then flip the thing over, and have INSIDE UP .
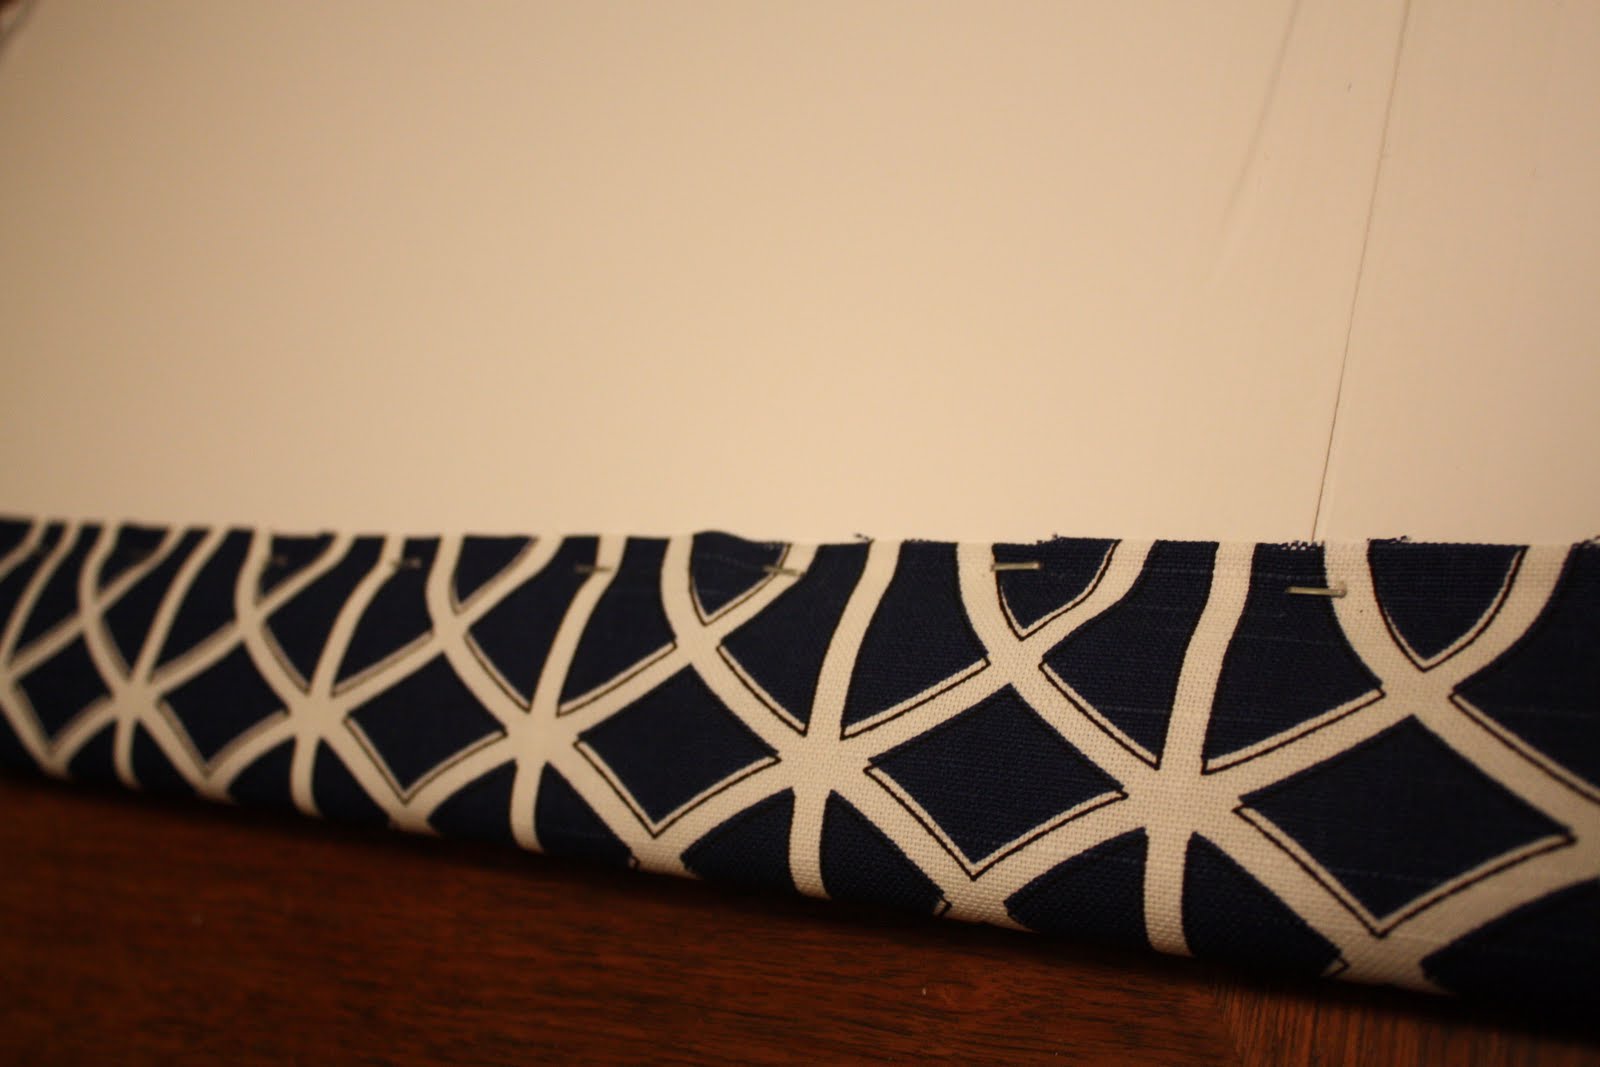
NEXT, line up your pattern to keep it straight along the edge.
(this is MUCHO IMPORTANTE) and it is why using a solid fabric is easier, but YOU CAN DO IT! Just pick a part of your fabric to line up and keep it consistent.
 |
…see how I followed that upside down V with the line in it and kept that LEVEL,
in this way, pattern IS YOUR FRIEND! |
…so staple all the way around about 2 inches apart, alternating sides to keep it nice and straight and NOT pulling to tight in any direction. CAREFUL not to press too hard with your gun (or too light) because you will go into your surface underneath, like I did! OR if you go too light, the staples don’t go in deep enough. The good news is : if they do not go all the way in, you can just push them in with your finger.
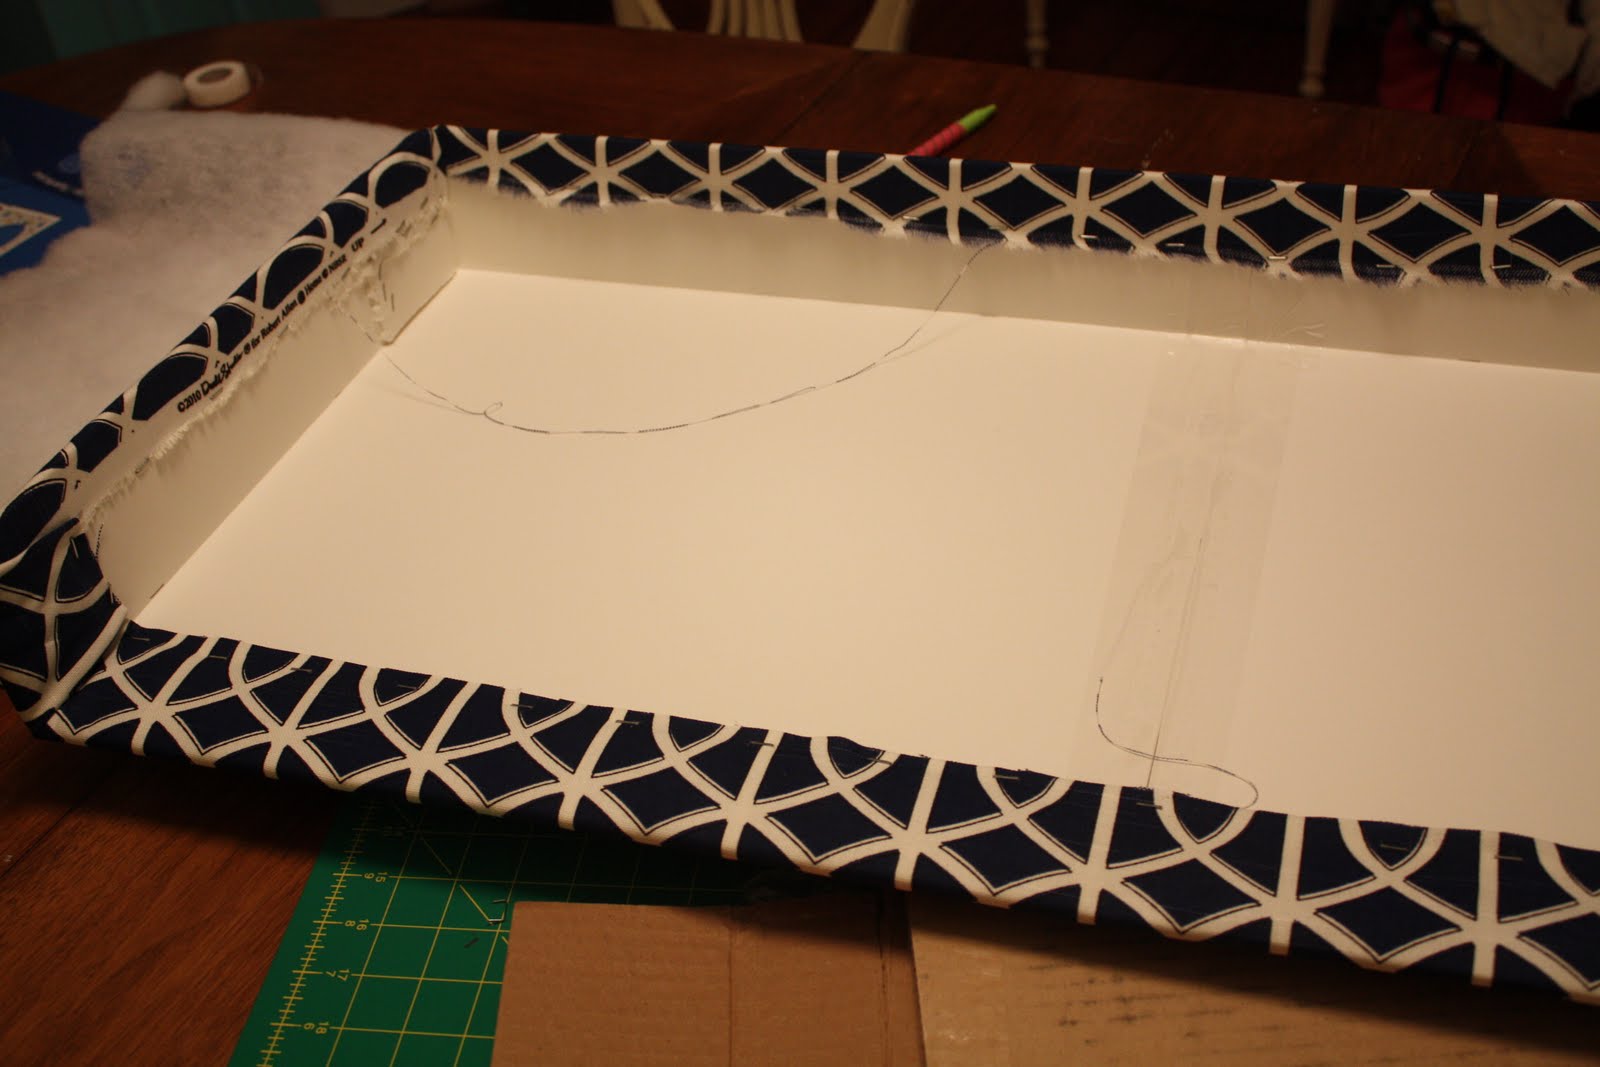
Lastly, I took some left over sheeting fabric to line my valance boxes, though lining is optional, but our ceilings are high and you can see INTO the inside and it looks unfinished. So I used my FAVORITE thing, Stitch Witchery, and ironed on the fabric!!! I stapled areas that looked unstable…or un staPle! ha!
I added some duck Tape to the underside of the top part…to keep the fabric down and seal it up.
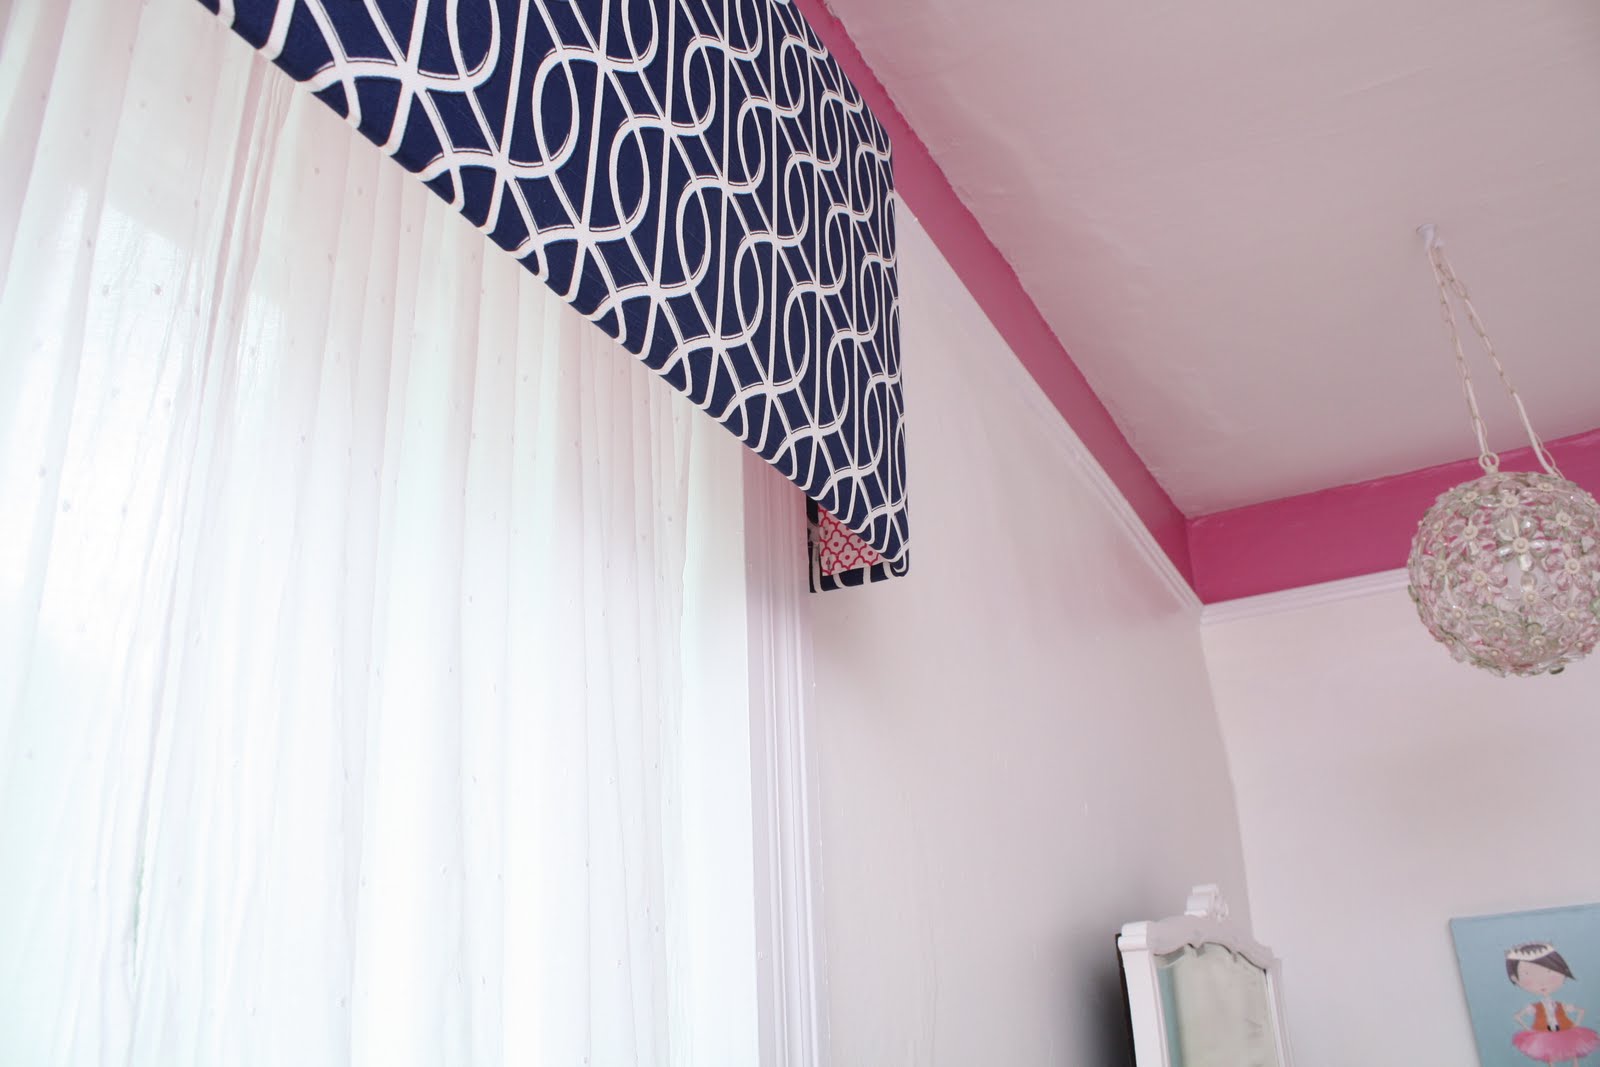
Now to hang them up.
I put nails all the way across the top of the window trim, about 5 inches apart,
then I hung the cornice on the nails.
To secure the box, I reached up underneath,
(I could not photograph this) and lay down a strip of tape across the nails.)
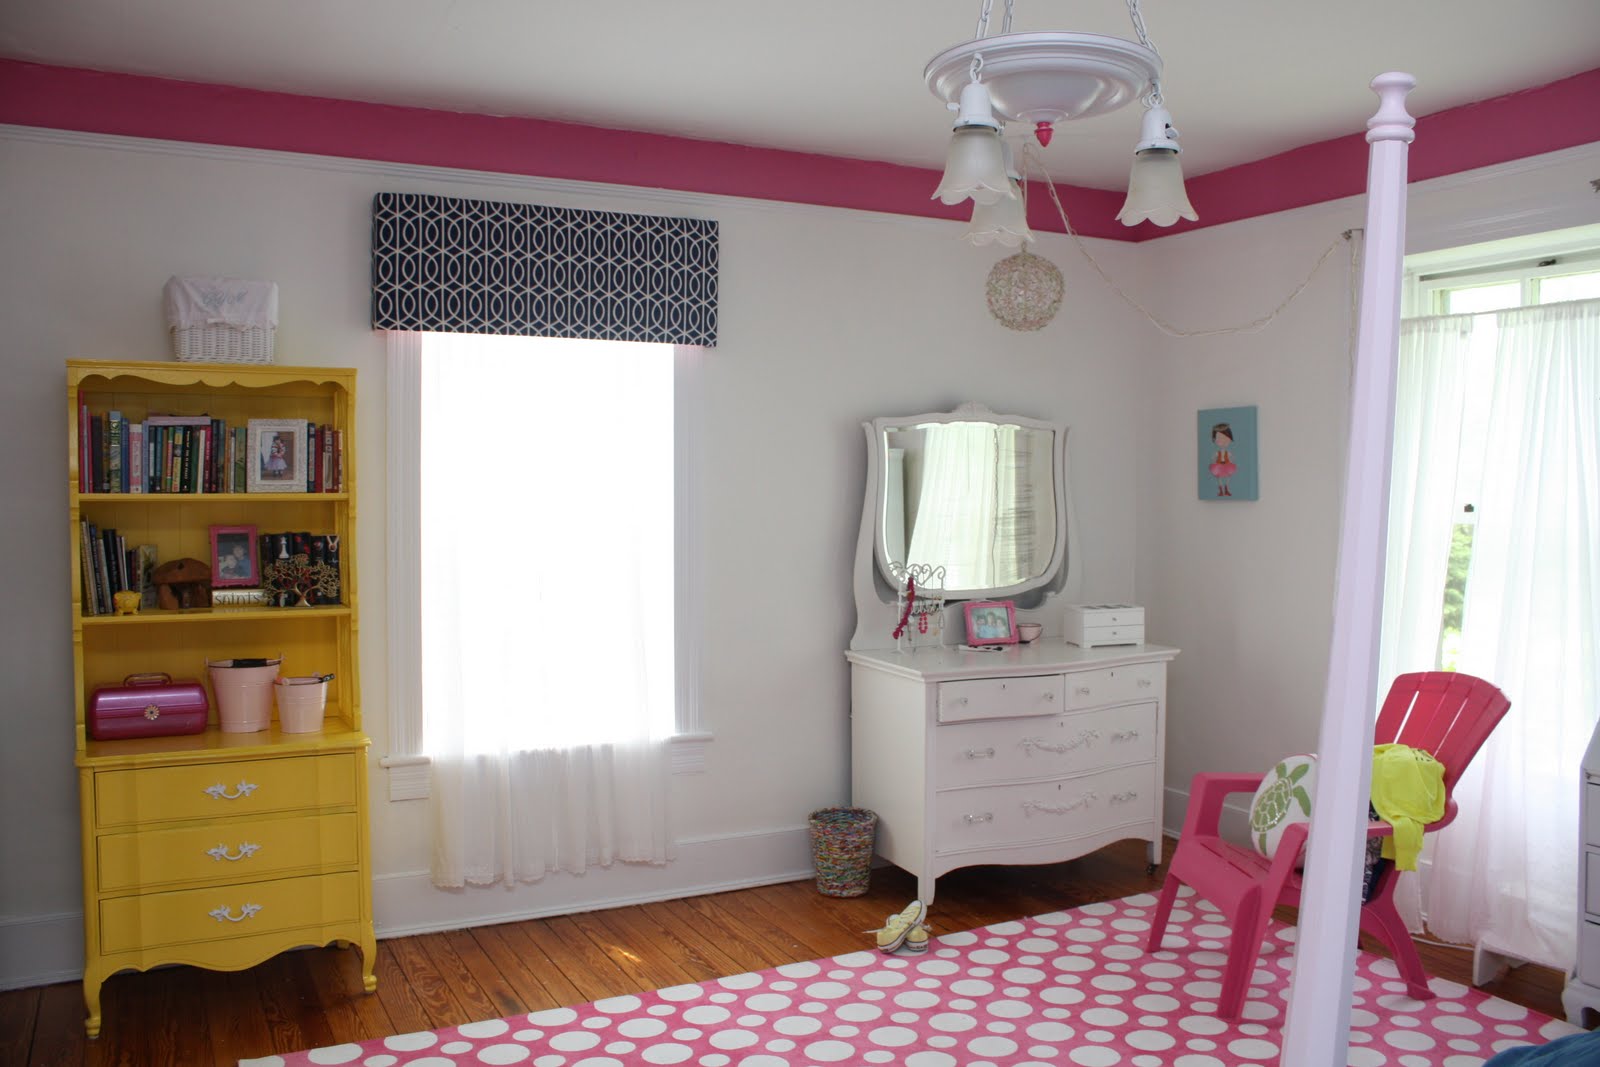
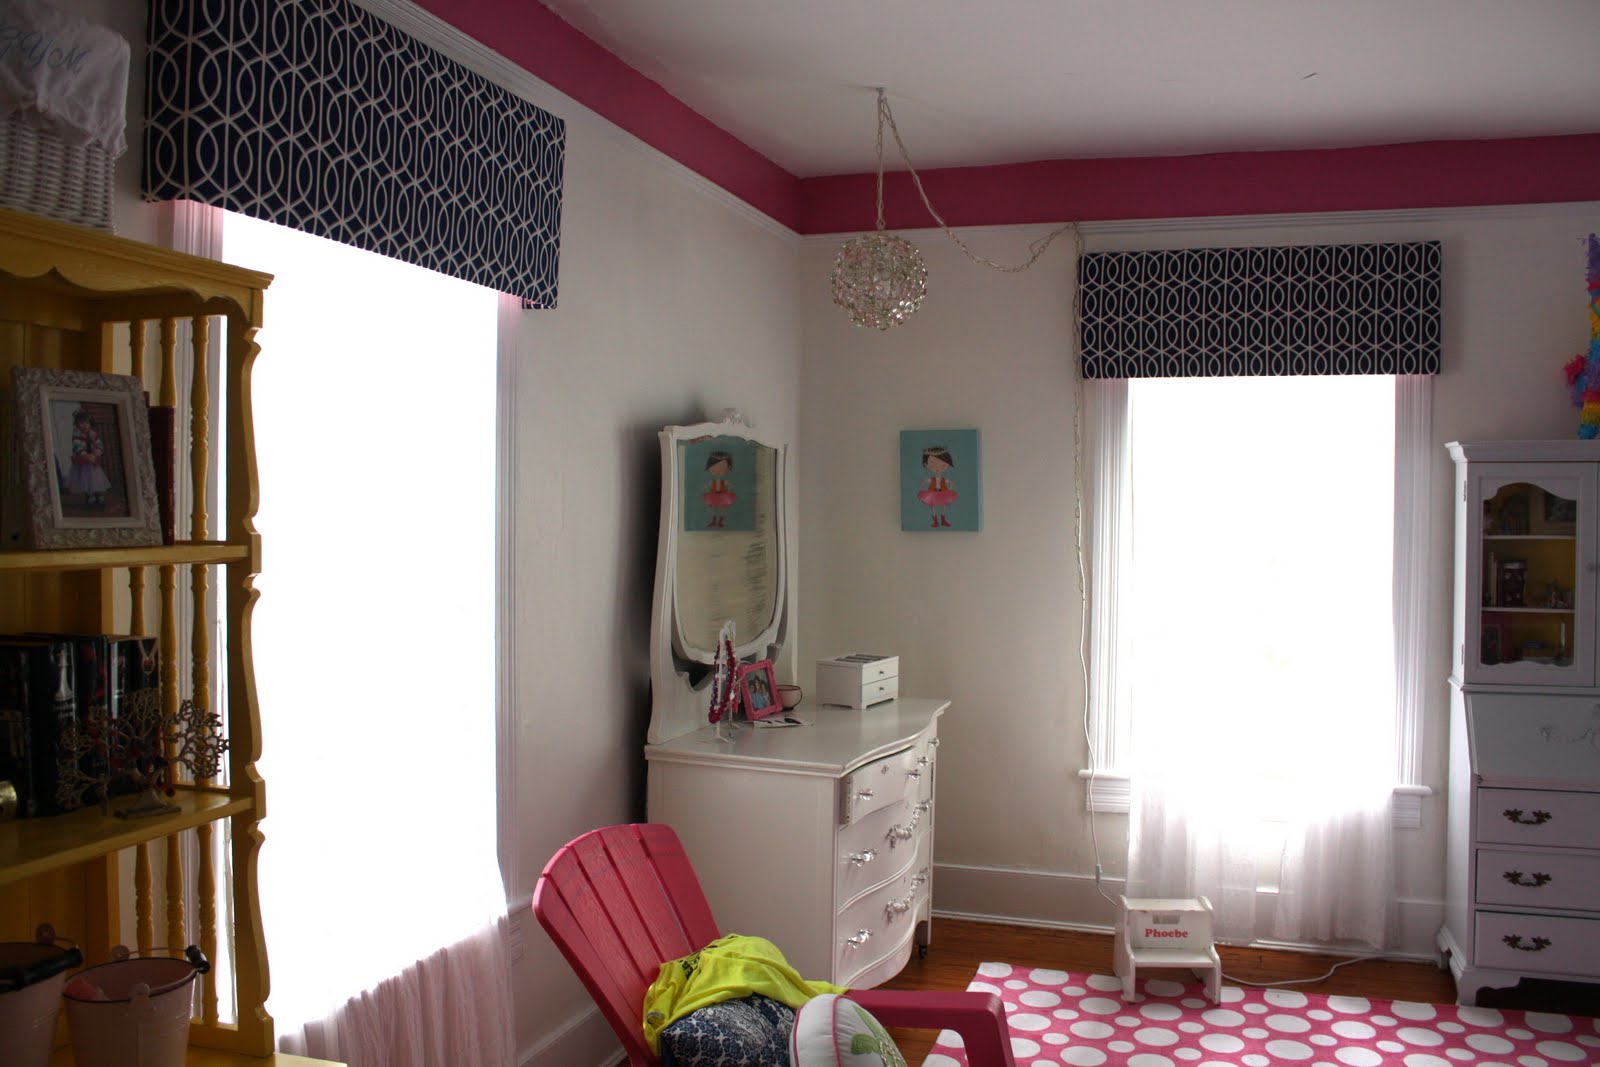
I finished the last one a few minutes ago, It took me exactly 30 minutes to do! Yee haw, I will post pictures of the
COMPLETED TEEN Room Makeover
tomorrow…for now…
 |
| Halleluiah!!!! |
TO MY LOVELY READERS – THIS POST PROBABLY RECEIVES OVER 500 PINS A WEEK, second only to the Pink cabinet. I would LOVE to see what YOU are doing, and if you have made these cornices for yourself! PLEASE leave me a comment and let me know how you have fared…if you made them and I would LOVE to see photos so I can do a post on YOUR cornices!!! Thanks in advance!


Love this Lesli! You are so darn creative. I really like these because they will be much lighter than wooden ones. Thanks!
Also known as valances. Or so said one of my interior design professors when I was in college.
thank you for sharing! I am definitely going to make one for my living room! what size of thickness was the foam board?
the board was the kind that comes in a package of 3, are 20″ x 30″ big and about 1/4″ of an inch deep. They are so nice and light.
This wonderful post totally contributed to the blog party’s success! Thanks for linking up at Creative Bloggers’ Party & Hop 🙂
I love the dwell fabric. Mine just came in the mail today in gray. Your idea does look super easy!
Thanks for sharing. I am thinking of doing this in my bedroom.
Hi! I just came across your blog after your house was crashed by Young House Love. I fell in love with the idea of a no-sew cornice. I want to do this for a sliding door we have at our house and want to make sure the the cornice is secure to the wall on the sides as well as the top, so that wind from opening the door doesn’t move it around. Any suggestions?
Hi Shale…hmmm. Okay, Phoebes are hung with just Nails BUT the ones in my bedroom, I put thoseup duck taped to a curtain rod and I just put the rod on the brackets. Now it looks pretty gross underneath, but in my bedroom you cant see the tape. You might see the tape though with yours because you will come in from the other side. What if you glued or taped onto the underside the old fashioned kind of curtain rod, you know the bent ones…in two parts??? I might need to think on this one…do some surfing. send me your email, via the email link on my blog…we will figure this out!
Hello, Lesli!
Found your tutorial via a search — I’m so excited to try this! I’ve read through your instructions numerous times but there’s still a couple of things I’m unsure about. I need a confidence booster. Can you help me? 🙂
1. Confused about wrapping the fabric around those box corners. Do I need to cut the corners of the fabric to do this? Or do you just staple on the fabric along the long sides, then fold in the boxed corners, then fold over and staple in the fabric over the short sides?
2. It looks as though only 3 sides of the cornice box need to be marked and folded. Am I correct or am I missing something?
I know it’s been a while since you posted this tutorial. I hope it’s not too late to ask for advice.
Many Thanks!!
Jayne
HI JAYNE,
Thanks for your comment. If I understand you correctly, you make the box first, then apply the fabric, so…think in terms of how you would wrap a gift. No science here, and no real wrong way, you ant it covered and smooth, but NO don’t cut the fabric, you will get frayed edges and it might be too short.
yes, only 3 sides, it is open on the bottom, not a complete box. so just the top needs to be boxed.
[…] pretty much followed this tutorial to a T so if you want an in depth how to, visit that […]
I love this tutorial but I bought 1 yard for two pelmets based on you saying you need a half yard for one and I don’t have nearly enough fabric! At 20 inches tall plus room for folding over and stapling, I suggest you edit the post to say 3/4 yard each. I hope I can get more fabric 🙁
from the tutorial: “Fabric- With 52-54” upholstery fabric you need about 1/2 yard for each Pelmet , this for solid fabric or a pattern that is horizontal. IF your pattern is vertical, then you will need the amount of yardage length that your window is wide. For example, if your window is 40″ wide and you have 44″ wide fabric but can use it the long way, you will need at least 49″ of fabric.
I have made an edit to the instructions. However I do encourage everyone to check their measurements prior to purchasing fabric and especially before cutting the fabric. The measurements depend entirely upon how DEEP and how wide YOUR cornice will be AND how WIDE the fabric you are using is. Thank you.
Leslie, I liked your box pelmet project and will certainly try this, your instructions are very clear,
thank you
What width quilt batting would you recommend? Thanks.
Personal preference by 1/4 probably? It has ben a while…I am getting ready to make them again or my daughters room.
My husband and I just finished making these valances but we used Velcro at the top to attach to the top of the windows. My husband stapled Velcro at the top of the window and we stapled the other side of the Velcro to the top of the valance. We did not make the box at the top but used the Velcro instead. We fabric glued the Velcro and stapled it. The Velcro is drying as we speak and I will take pictures tomorrow when we put them up.
Velcro is GENIUS and what I will use next time for sure! Thanks for sharing!!!!
I would like to send you pictures but I don’t know how to do it.
kathy
If you email me at lsdevito@gmail.com I can talk you through it
How would you connect 4 or 5 boards together, I have a long window.
Me too! Wondering the same!
I would use boards cut in thinner strips to reinforce the back and somehow hang it in the middle as well as the sides. I think if I were doing these now I would TOTALLY utilize command strips – I think they would be a hug asset! I used nails with mine back then but nowadays I use command strips with everything!!!!